Teaching the cue: Stay – Part 1
The first step to teaching the cue for “stay”.
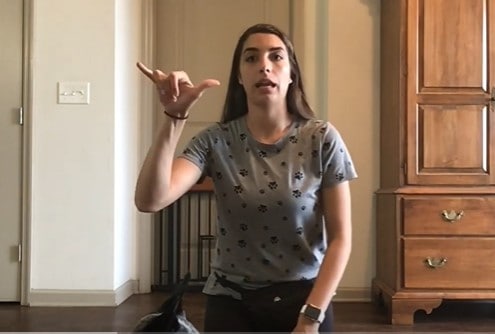
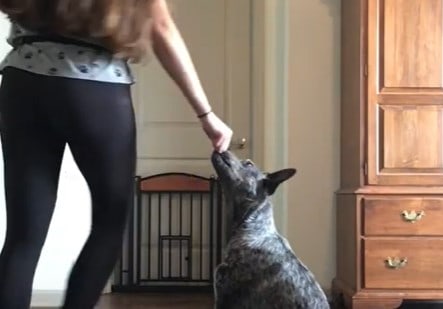
Like a lot of things in dog training, we start small and work our way up to the final behavior. This video outlines the behavior of “sit – stay – pivot”. I am in the habit of saying sit – stay, but a down – stay is totally fine as well. It’s whatever you or your dog prefers.
Start by placing your dog in the sit or down position, then taking a very small step to the left or right. If they don’t move, that’s when you would add your verbal or hand cue, “stay, yes.” It is important that you don’t use the cue before you know if they will correctly perform the behavior. If I were to say “stay” and then Sydney gets up and walks around, that would completely change the meaning of the cue. Again, these are very small steps to the left and right of the dog, then marking the correct behavior, naming, and rewarding the stay behavior!
Teaching the cue: Stay – Part 2
The second part of teaching your dog the “stay” behavior.
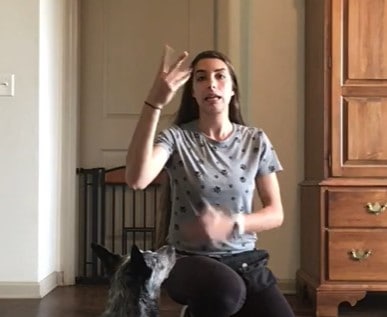
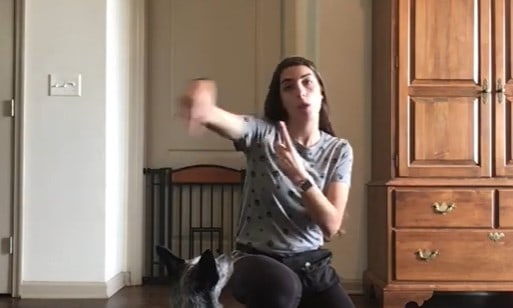
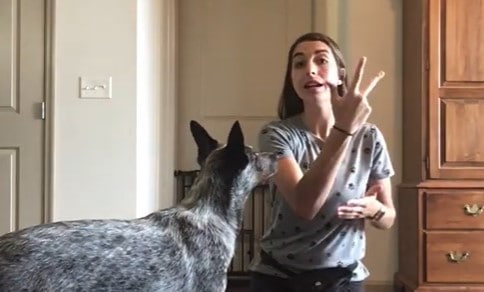
This video talks about doing the exercise “sit, stay, around.” While doing this, we walk all the way around the dog to help continue to teach the stay behavior. There are four parts of this exercise.
“around”
*For each one, make sure your hand remains stationary and your body moves around without your hand moving around in a way that the dog will get up to follow.
1. Showing the dog a treat in a way that they can taste it but they don’t actually ingest it until its complete.
2. Showing the dog a treat then putting it in your closed fist

3. Closing your fist with no treat inside
4. Putting your hands to your side or behind your back Do each of these steps about 5 times before moving to the next one (repeat, repeat, repeat).

Remember, if your dog prefers to lay down instead of sit, that’s totally fine!
Good luck, like and subscribe, and be sure to reach out if you have any questions!
Teaching the Cue: Stay – Part 3
This video is the final part of teaching your deaf or hearing dog the “stay” behavior.
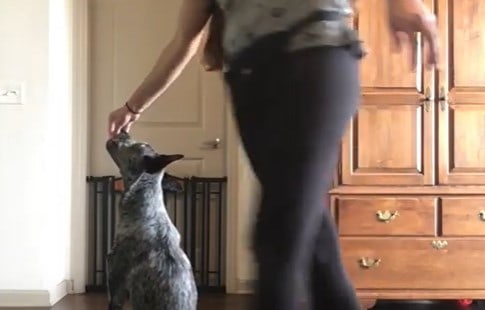
Now we start to do what people traditionally see as “stay,” which is asking your dog to stay and then you walk away from them. I also introduce the idea of the Three D’s: Distance, Duration, and Distraction.
First I start with duration (time). I take a small step away from Sydney, count to 10 (but you can start with 5) and then quickly return, mark, and reward.
Then, I tried the same thing, but counted to 20, and Sydney got up and “broke” her stay at around 16 seconds. That’s okay because it just means that I moved too quickly for her, and I need to go back a step.
I go back and count to 10 successfully, then go up to 15- again, and success!
When you are working on Duration- don’t add too much Distance, stay close by.
Next, we work on Distance. Only adding one step at a time, you’ll just take one step backwards, then forwards towards your dog, then mark the correct response with a “yes” sign and reward your dog with a high value treat.
Increase to 2 steps back and forward, then 3, then 4, 5, 6, etc.
Remember that the environment you’re training in is going to be the basis for your “Distraction” criteria.
If I was working on the “stay” cue in a busy park, it would be very short and I would not go far at all. Remember to think about those three D’s when training any cue.
That’s the final step to teaching stay!
Good luck, like and subscribe, and be sure to reach out if you have any questions!
Happy training, Savannah & Sydney
Follow me on Facebook and Instagram – Savvy Dog Training – @SavvyDT I also offer tele-training – contact me at savannahlefors2@gmail.com
or call (904) 242-6772