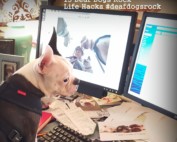
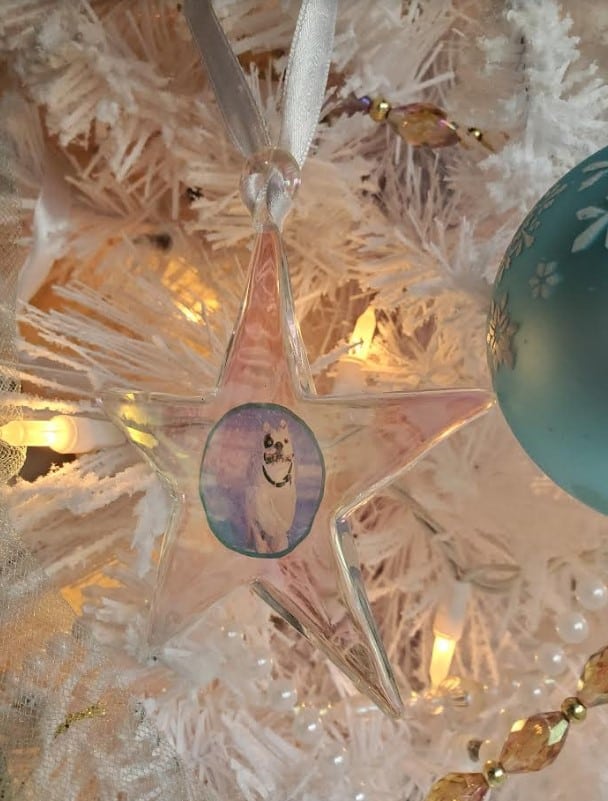
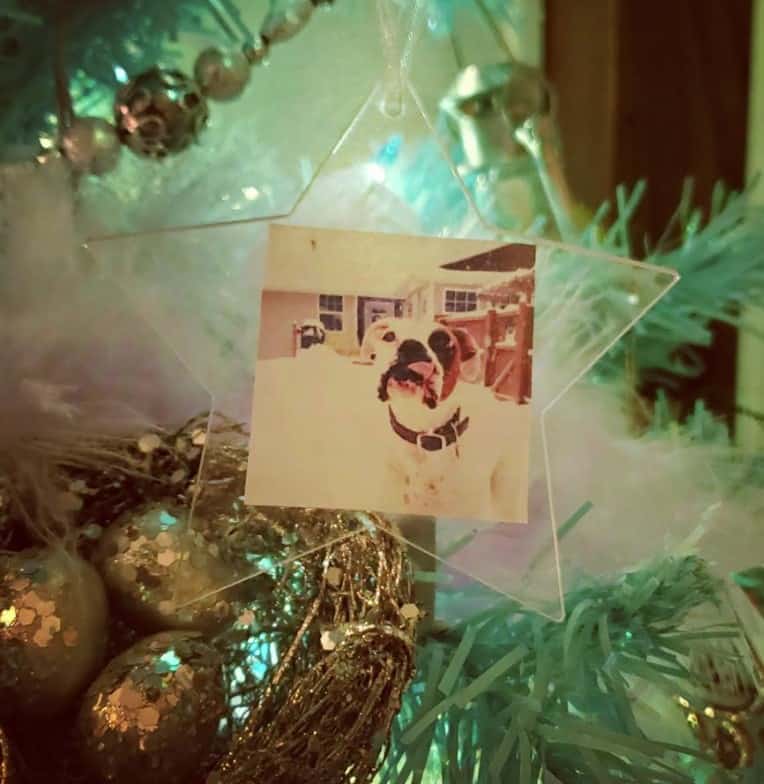
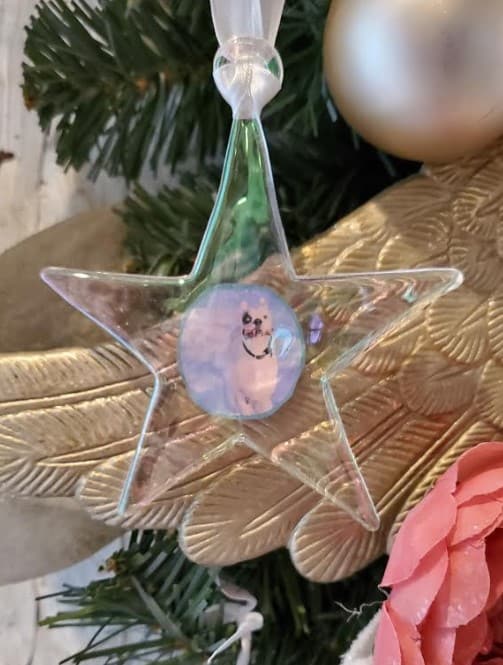
Since I love to make special personalized Christmas gifts, I thought all you dog lovers would love my DIY pet ornament project. It is very inexpensive, you can use your favorite photos, and this project takes no time at all. It took me about 3-4 minutes to make each personalized ornament. I also did a combination of memory ornaments of dogs and horses who have recently passed away. I recently added ornaments of our three new dogs we have adopted over the past two years (Axl, Marshall Tucker, and Ringo Star). These holiday star ornaments are less then a two dollars each at Michaels. In the month of December, Michael’s always has 40% to 60% off their Christmas ornaments so each ornament runs right around a dollar a piece.


Also you can get a 50 piece flat set of Acrylic Christmas ornaments for under $20 on Amazon by clicking here.

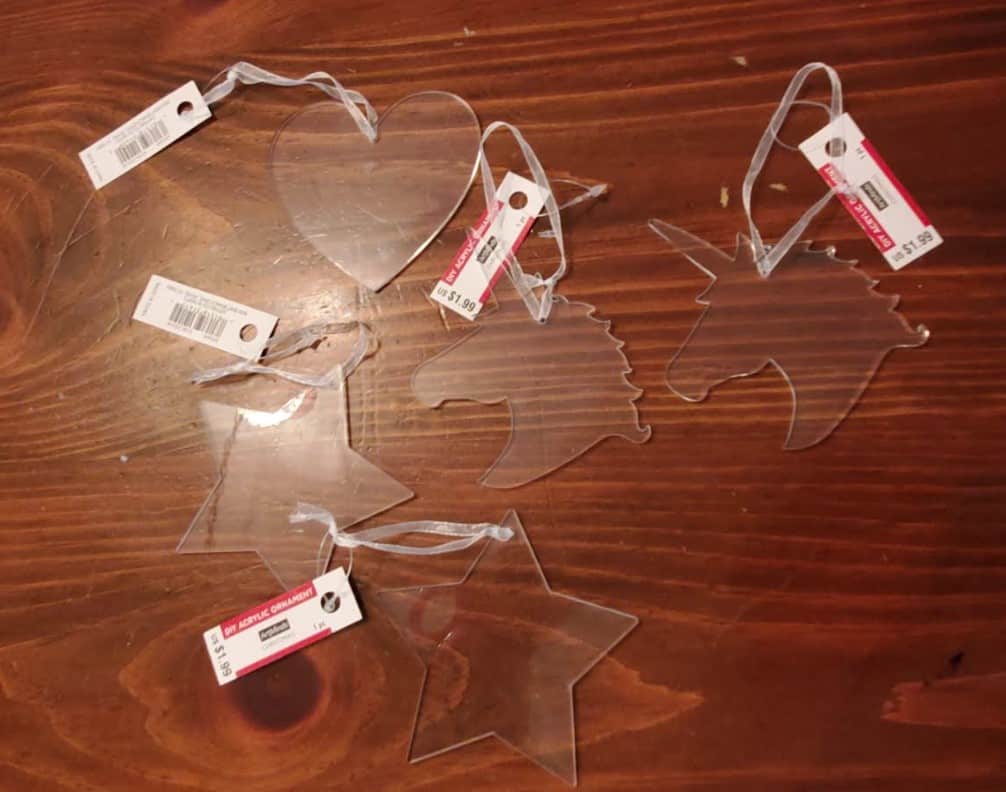
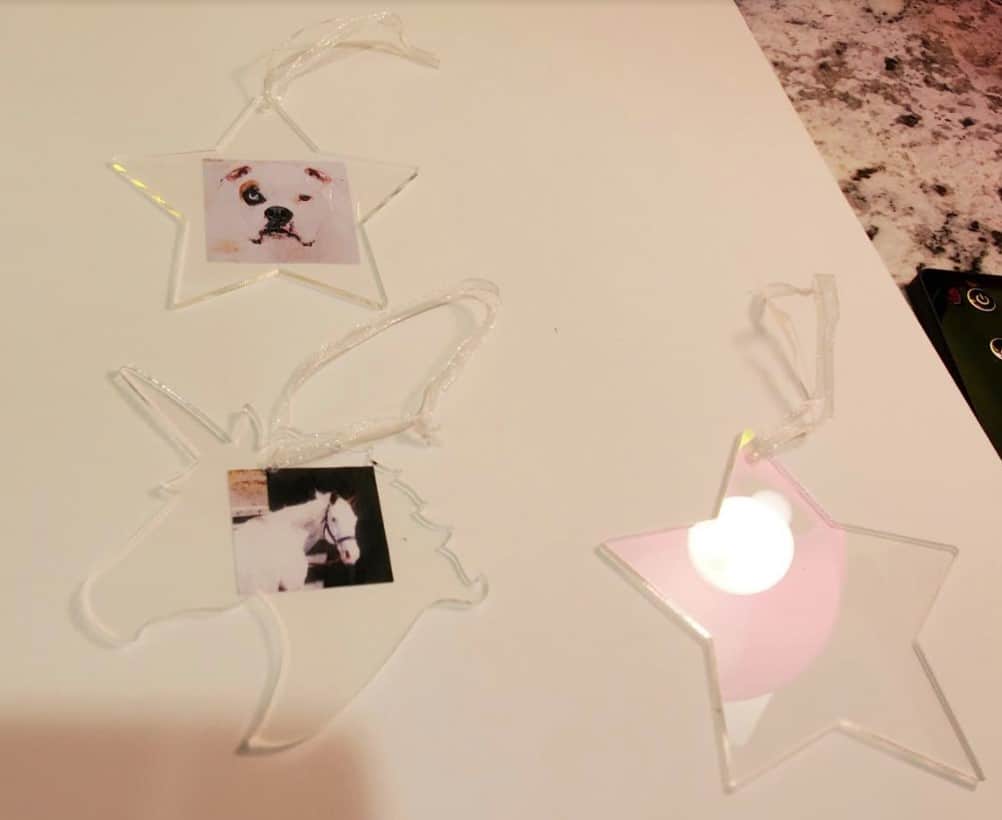
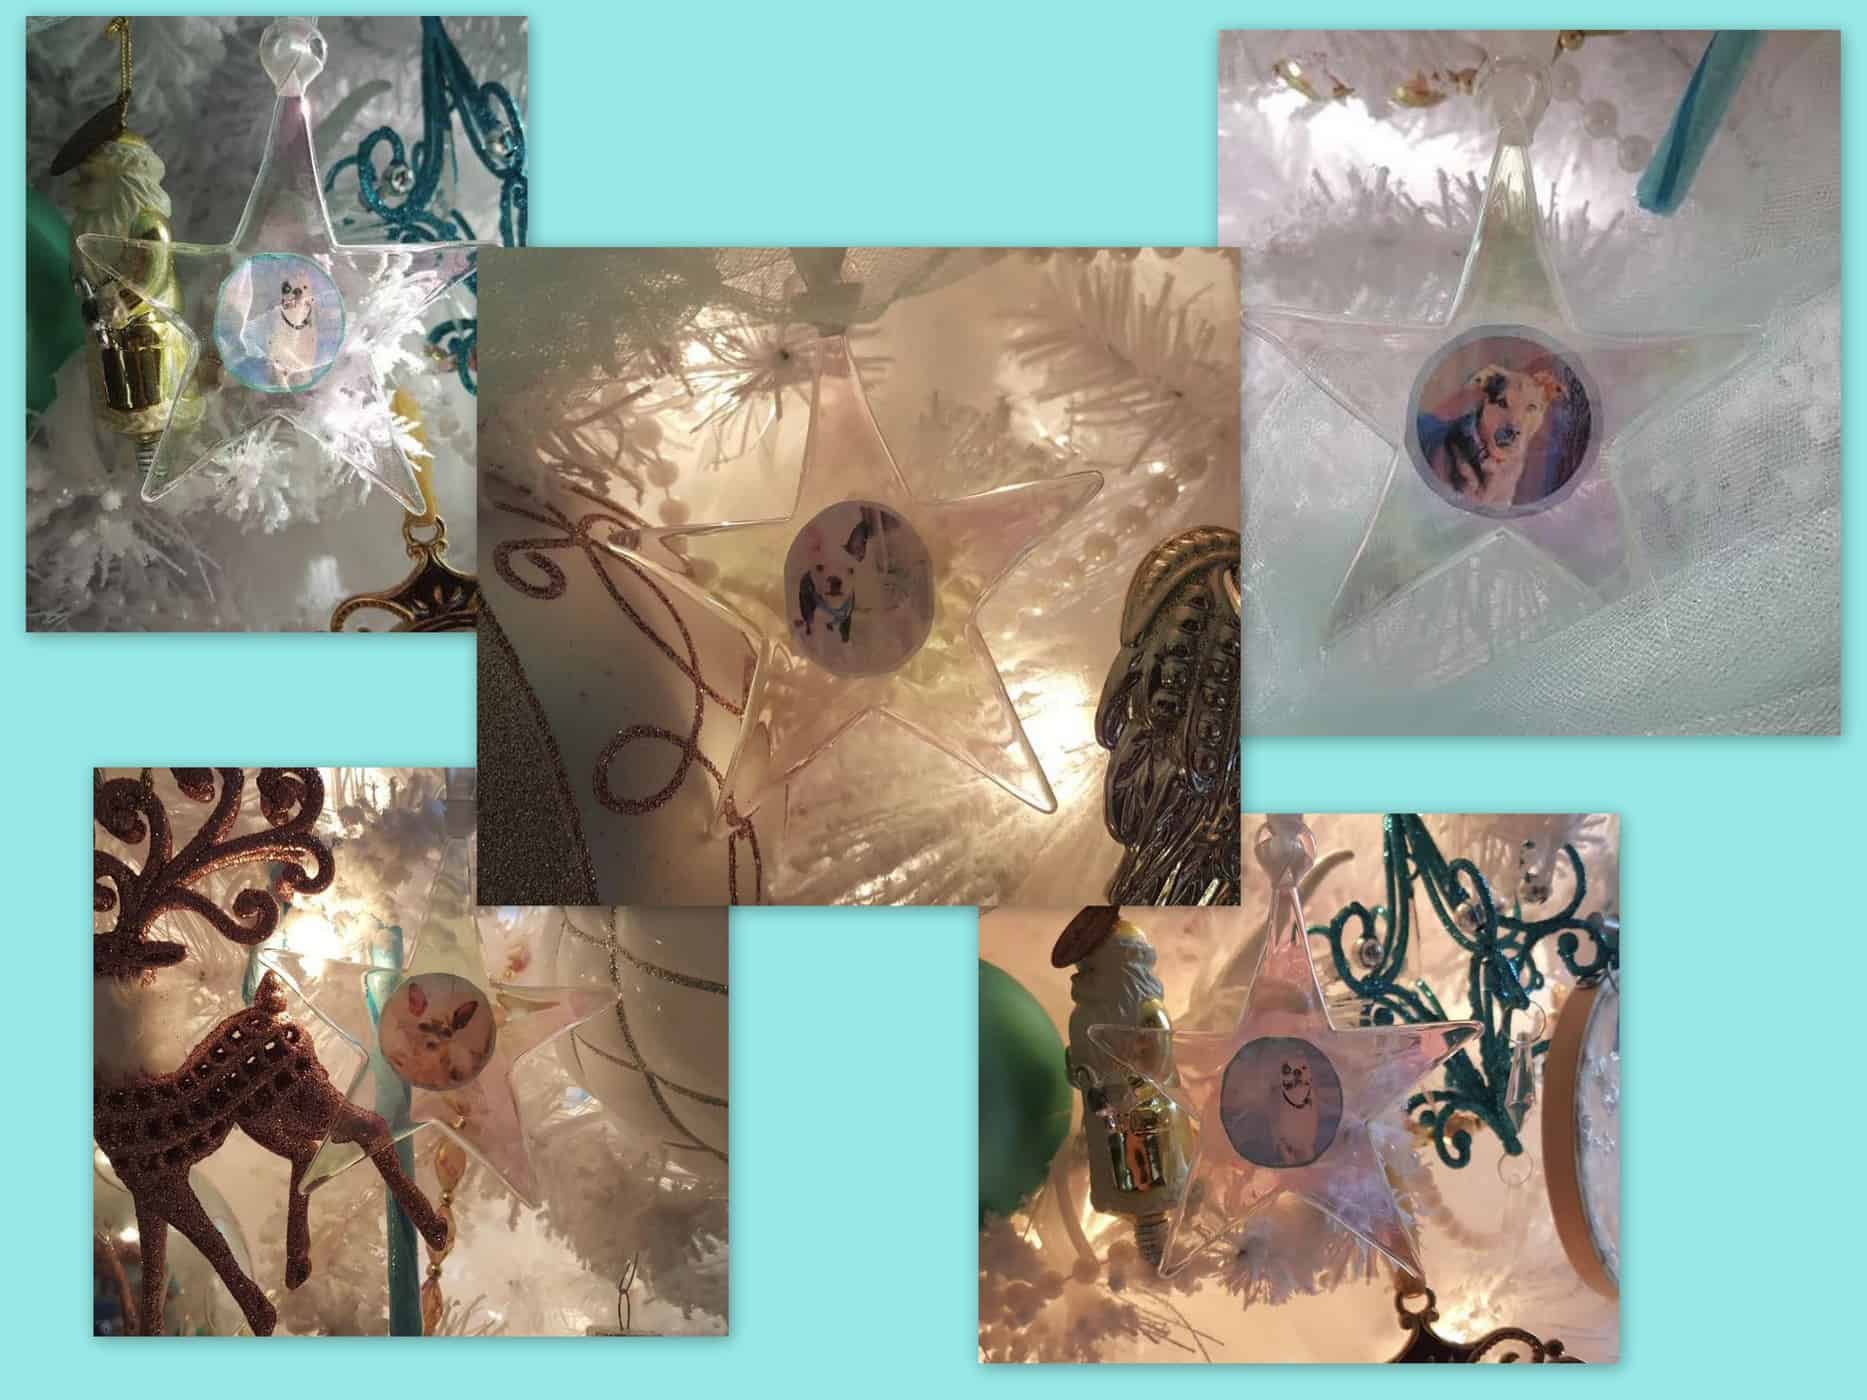
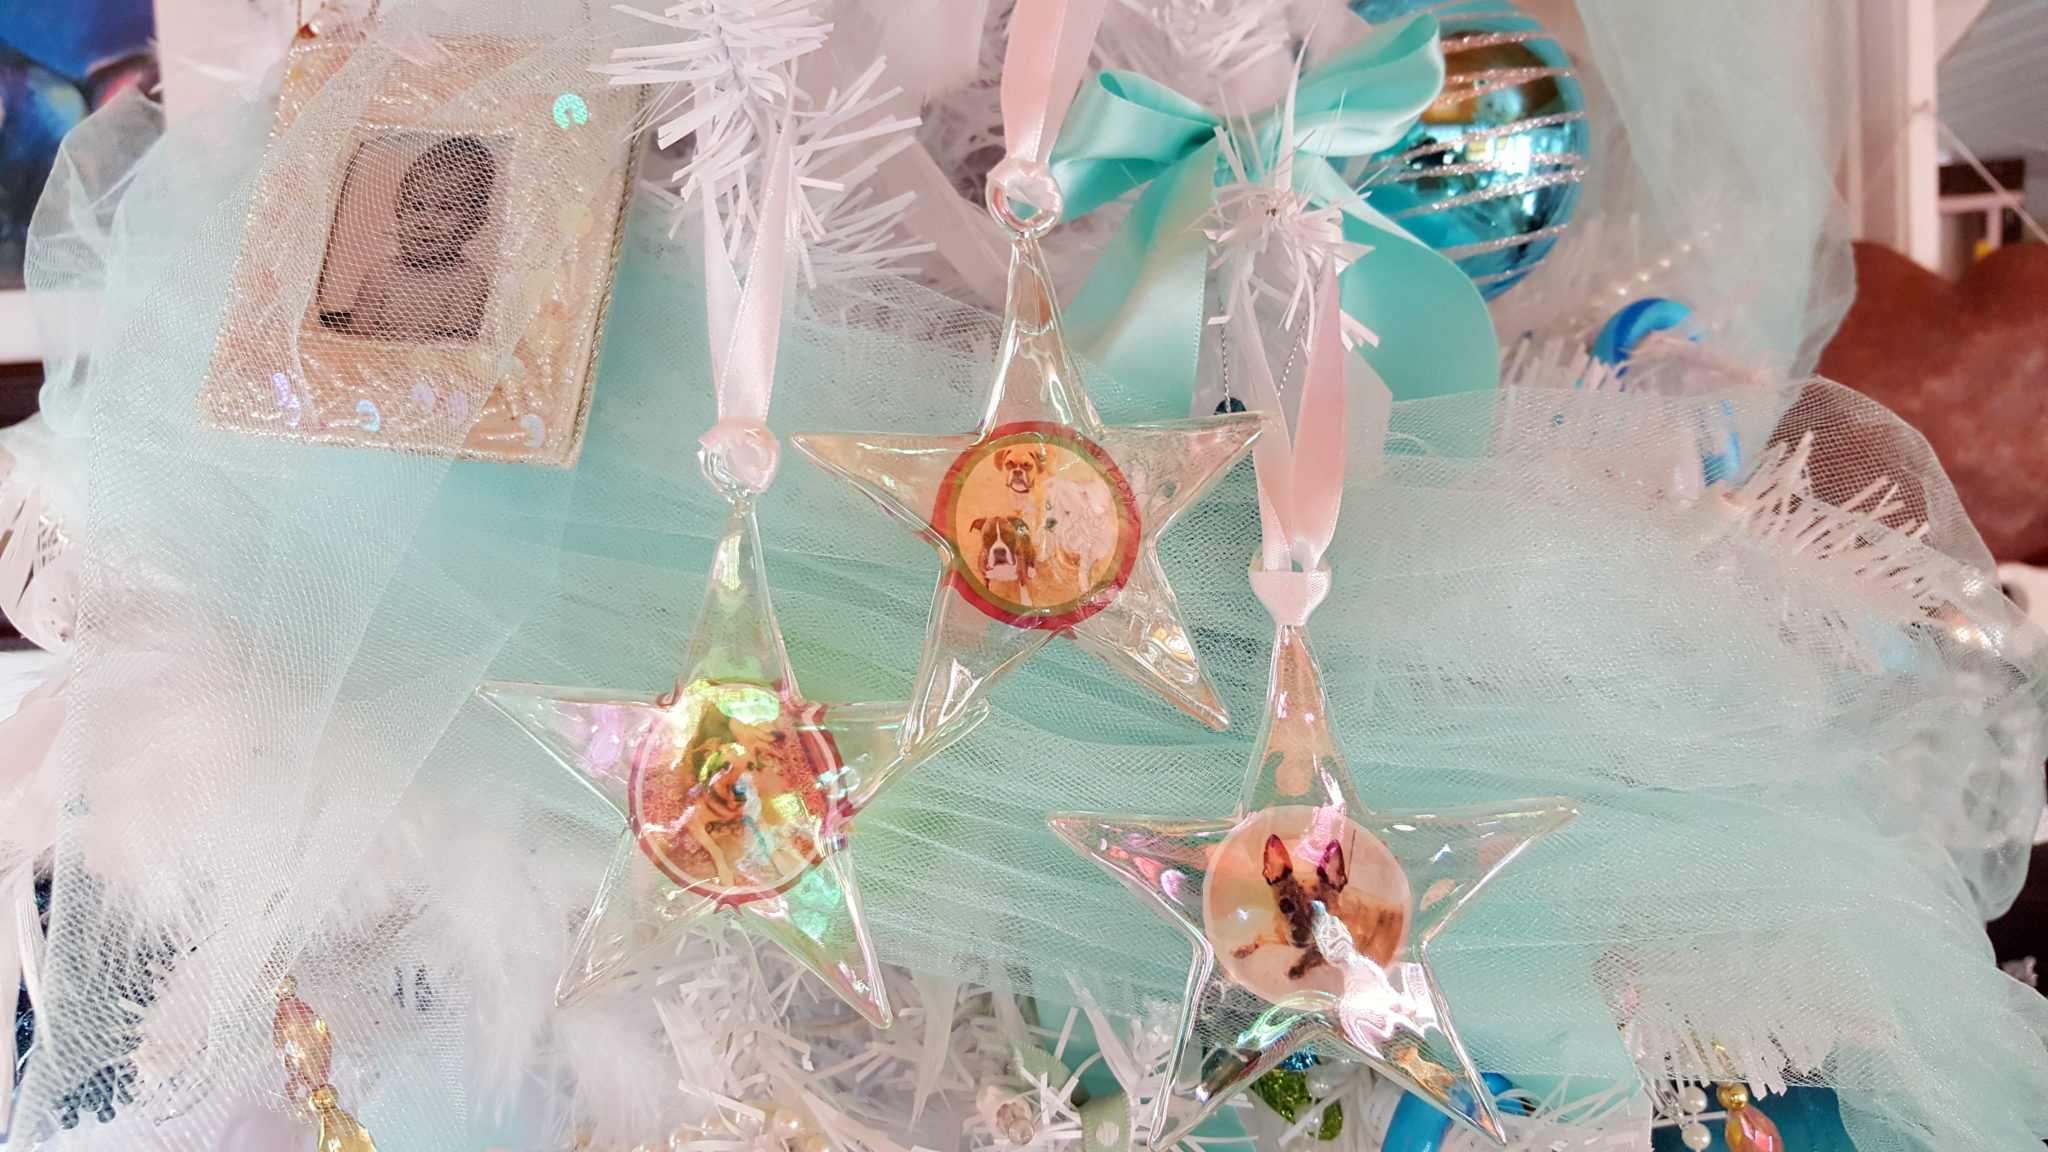
The tutorial below gives you a step by step instructions as well as the list of supplies you will need. I went back to Michael’s to see if they had the clear plastic star ornaments and sure enough they did. This year the stars are flatter and bigger so I decided to do collage ornaments (2 photos on each ornament) and I also purchased a plastic heart ornament and two unicorn ornaments. With the round ornaments shown in the photo above off Amazon (30 count) and the Mod Podge, you are looking at a cost of $16.00 total to make 30 hanging photo ornaments at .50 cents each which is a great value.
This year I am not putting a fancy back on the ornament. I am just going to glaze each photo on to the ornament (simple, fast and easy). I cut them all out and lay them out on a piece of white paper so I can arrange each collage before I glaze it to the plastic see through ornament. So all you will need is the ornament, the glaze and a paint brush to brush the glaze on the front of the photo, press to the plastic (get all the air bubbles out and let dry). This project is supper easy peasy!
Michaels usually has the ornaments at 50% off the first 2 weeks of December
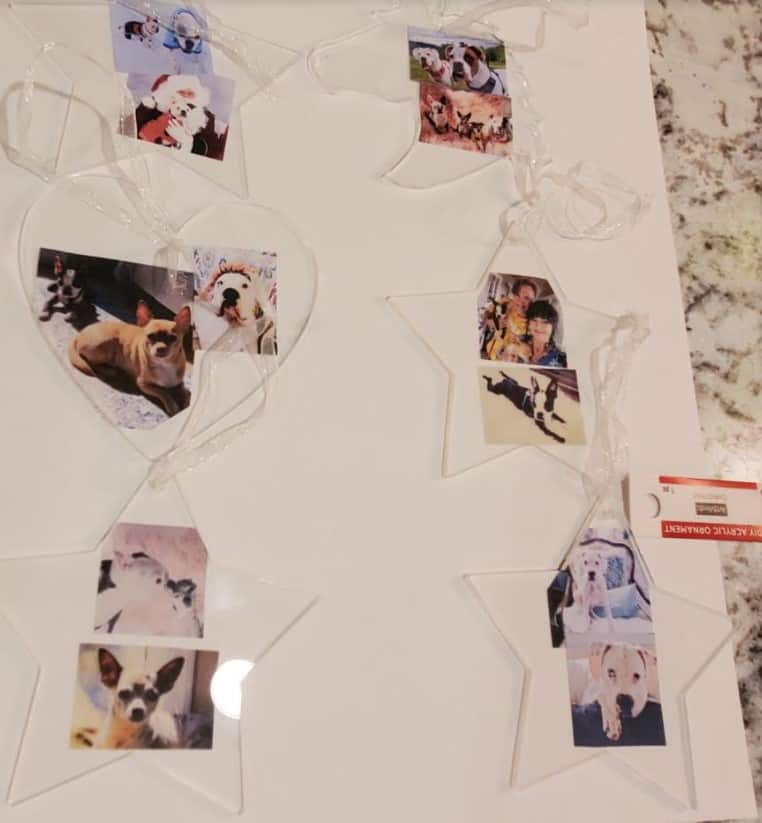
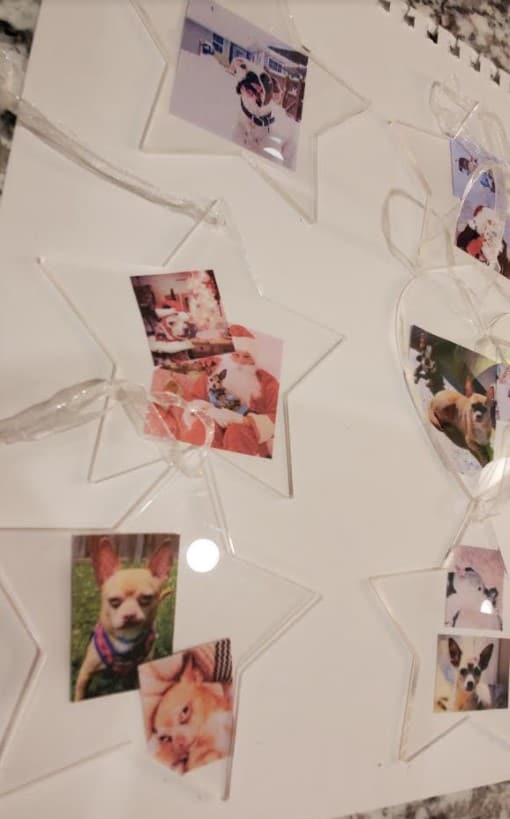
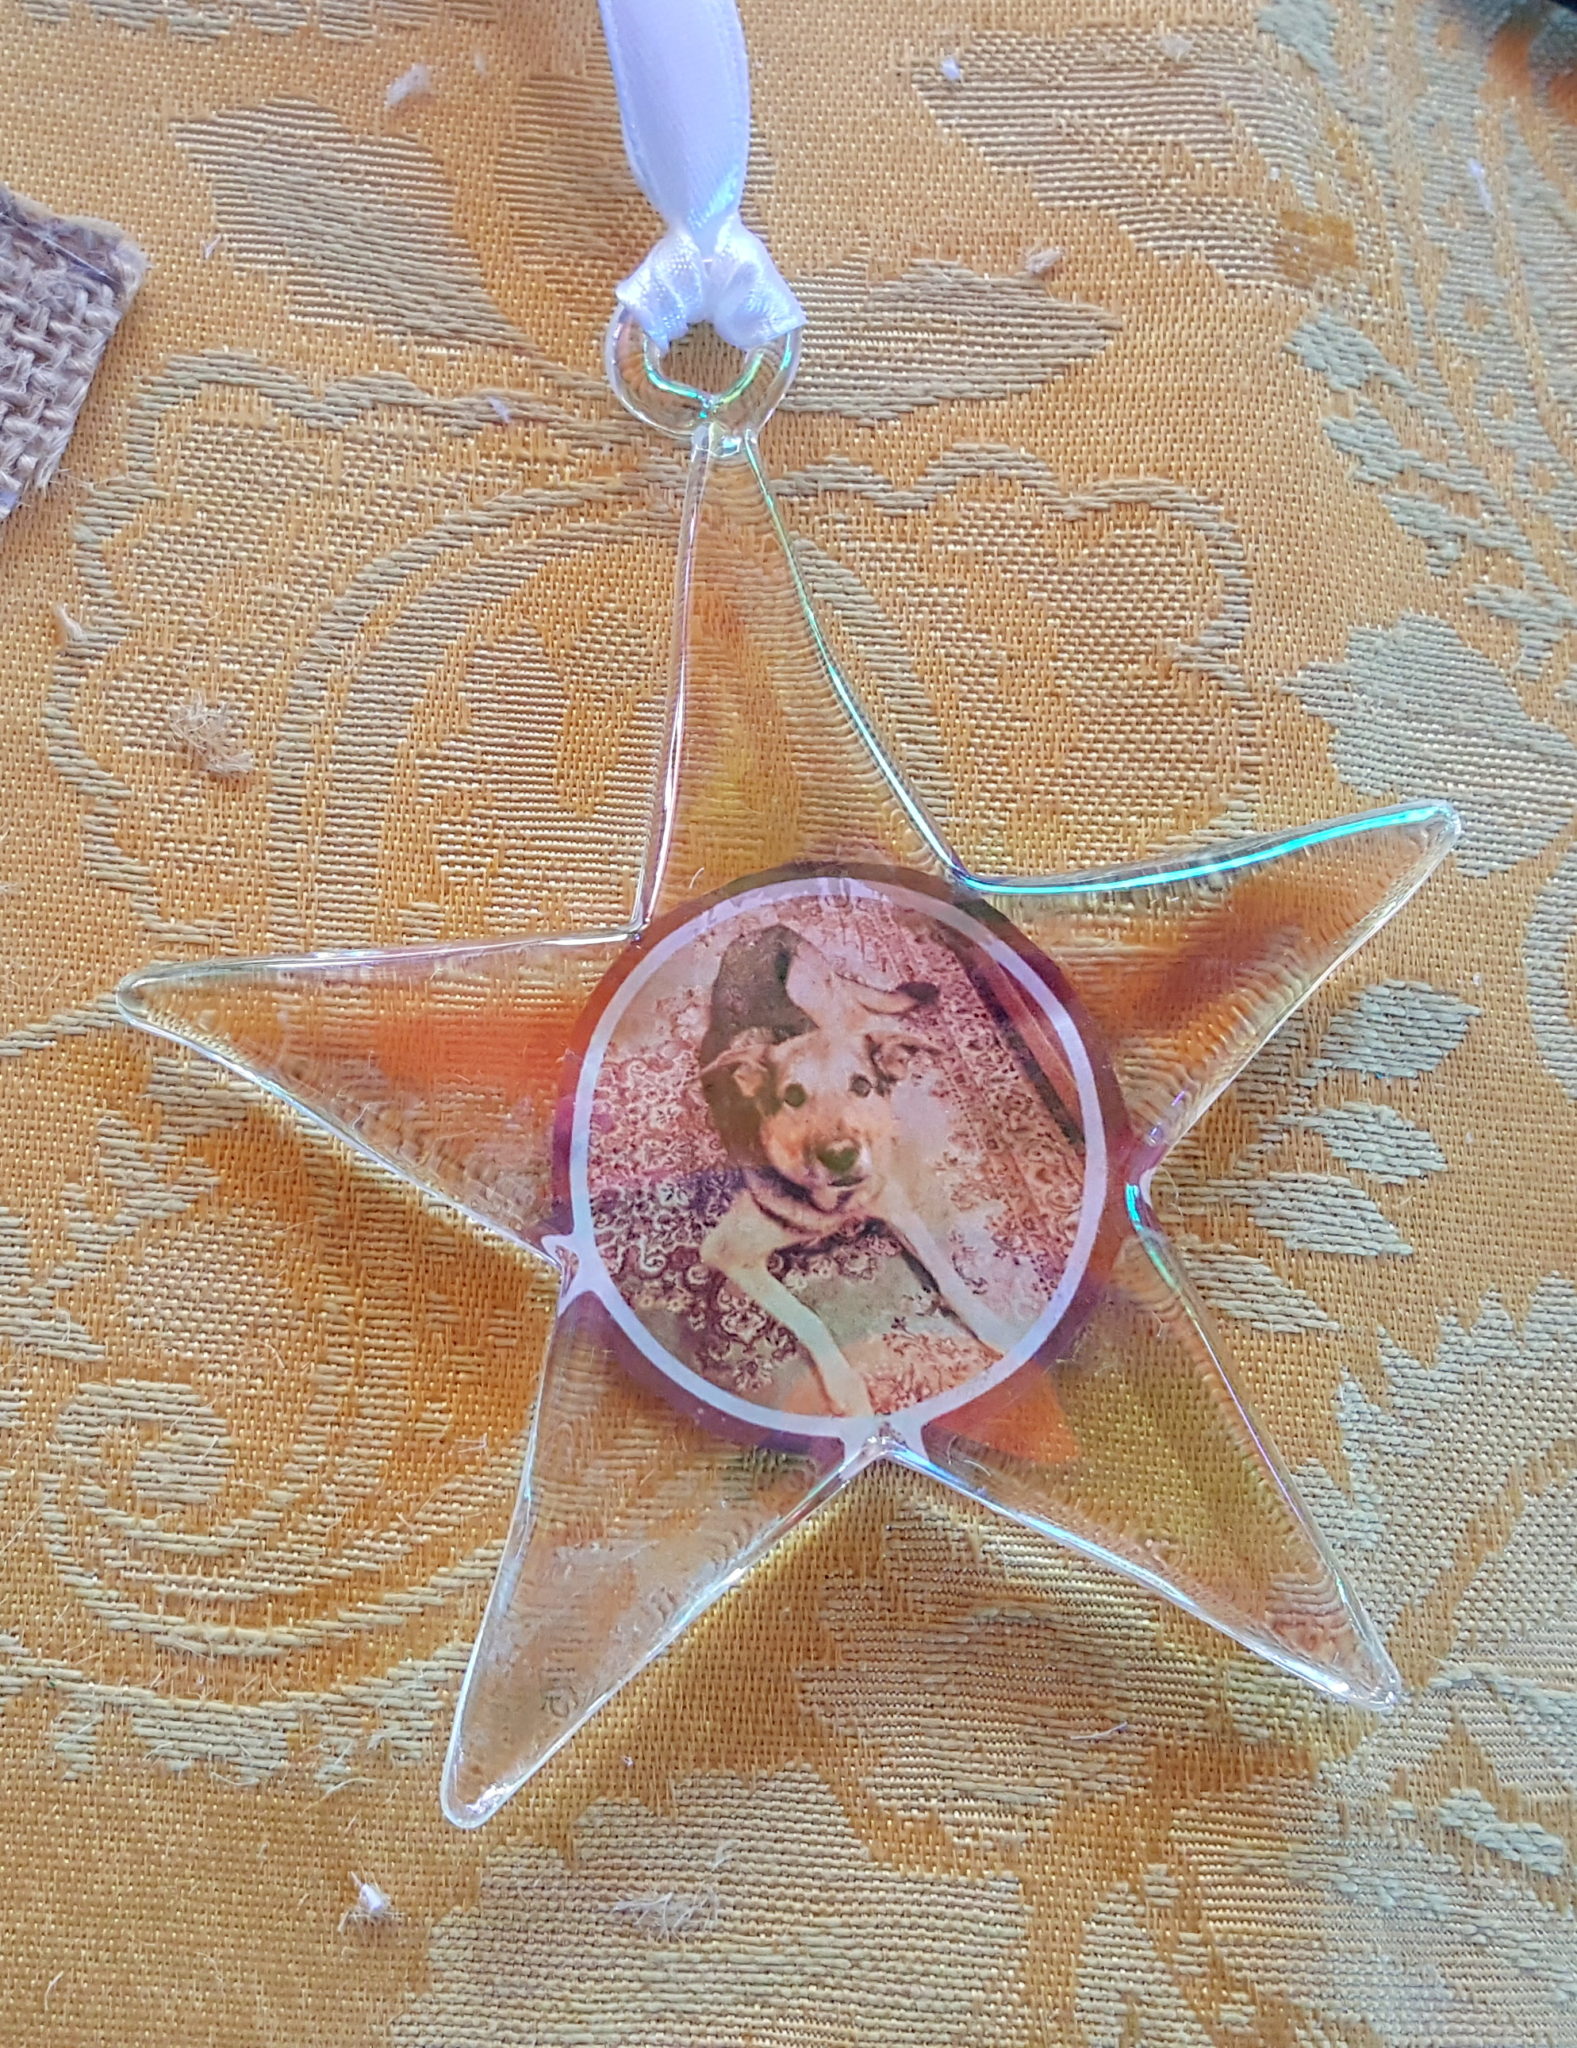
Photos above: Lay the two photos out under each plastic star, mark with a pencil where you need to trim each photo and trim it and arrange the two photos to fit each star.
You can also use Mod Podge instead of a glazing medium which you can get at Walmart. Just take a brush, brush the photo with the Mod Podge, press it against the clear plastic ornament (photo side down to press into the plastic ornament) and there you have it. I also let it dry and put a layer of Mod Podge on the back of the photo to seal the back of the photo. Be sure you wipe off any overage outside of the photo on the plastic before it dries with a hot cloth.
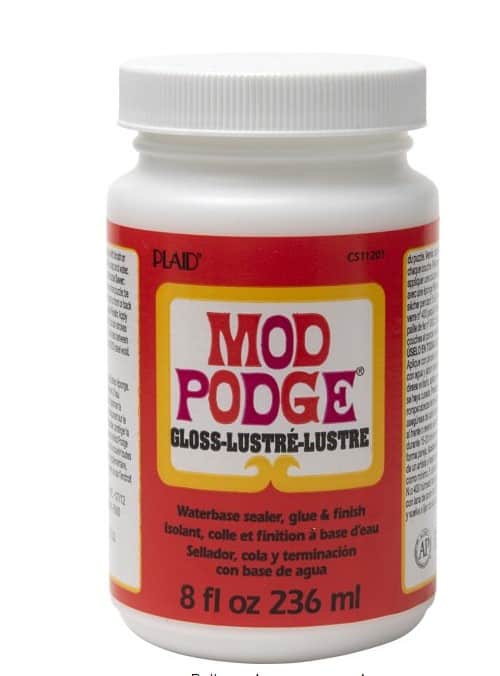
Mod Podge runs $4 to 6 for a 8 oz bottle
Below is step by step tutorial along with additional ideas and where to order star ornaments to make your special Holiday tree ornaments for yourself and for your loved ones.
Tutorial with additional ideas to use for wonderful holiday photo ornaments
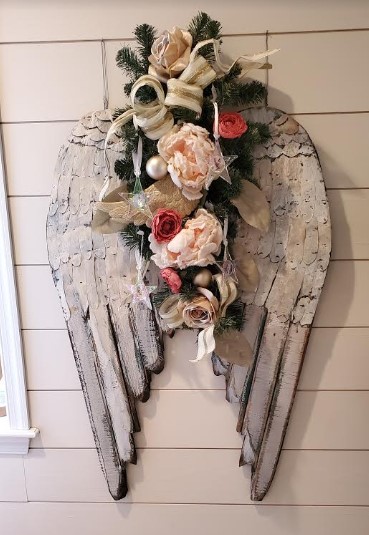
Above: In 2019 I put together a memory Angle wing display for Christmas with all the dogs we have lost over the past 20 years. I love this display!
This project literally takes about 3-4 minutes per ornament. What you will need:
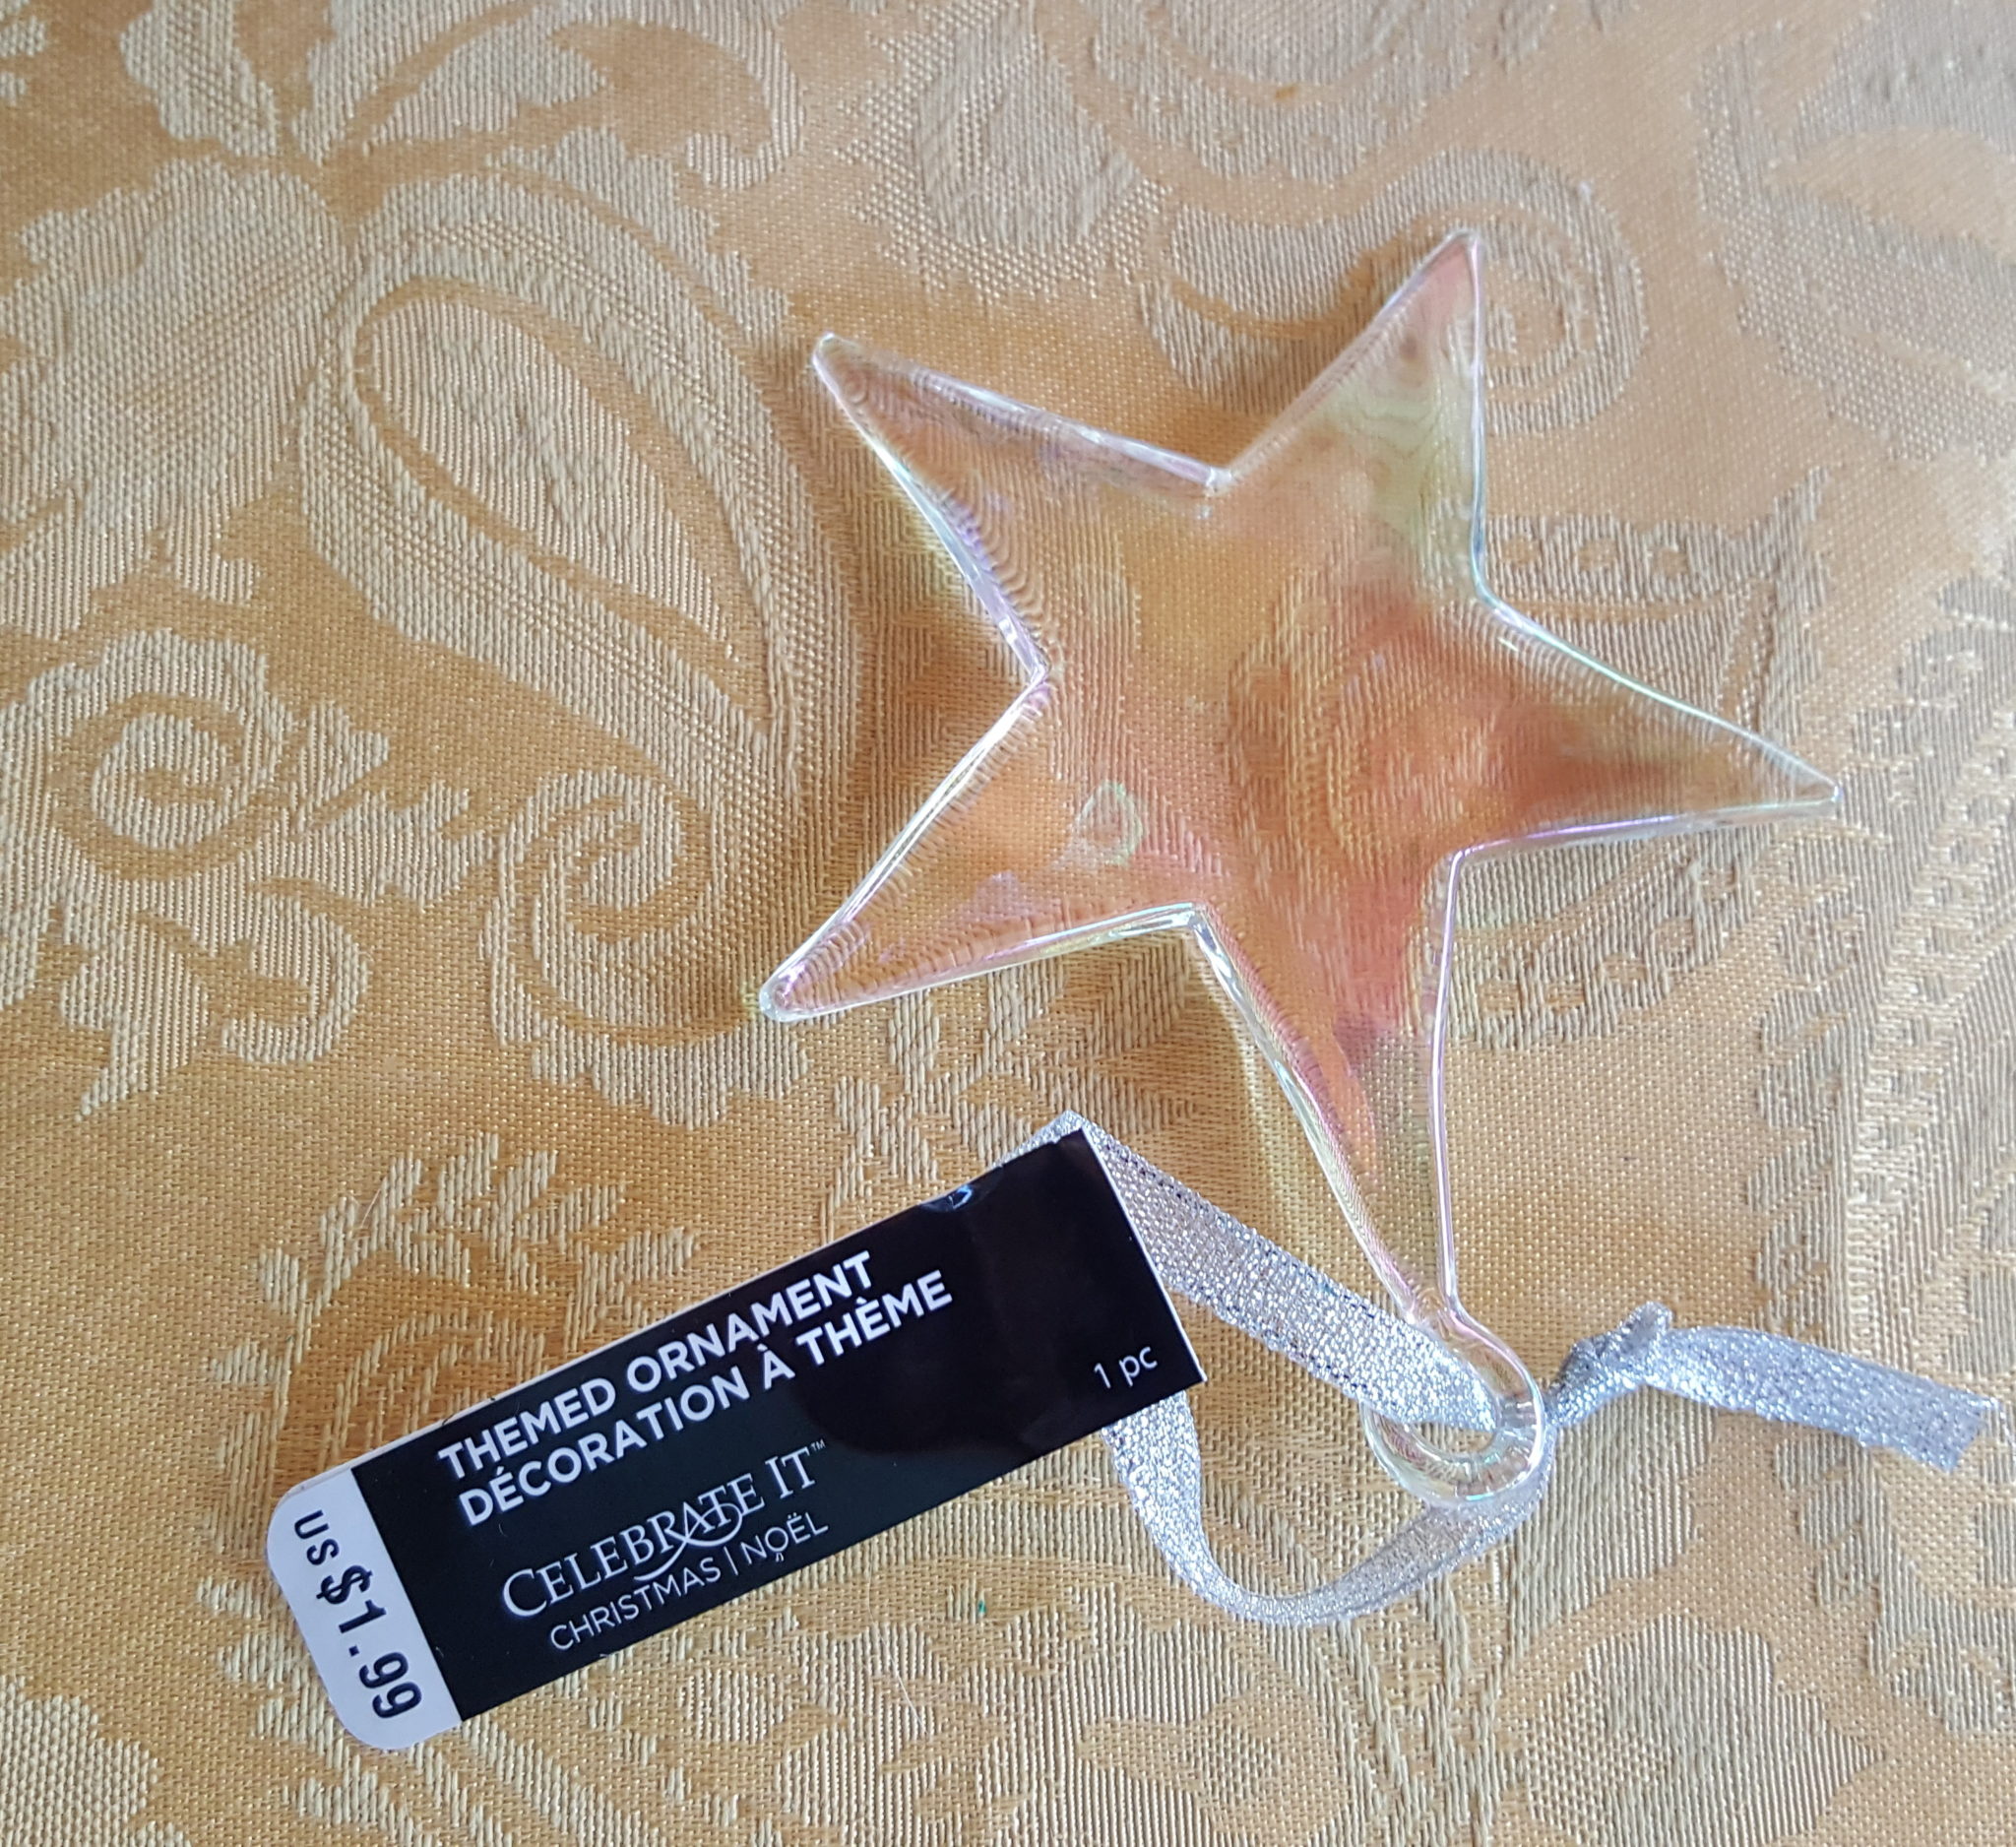
- Clear plastic Star ornaments from Michaels here. These run $30.99 per 24 pack but this time of the year that price can be as low as $15 for 50% off.
- White ornament ribbons (optional) – I did not like the ribbons on the star ornaments so I replaced them with white ribbon ornaments (less than $2 at Walmart)
- 1 small bottle of Diamond Glaze
- 1 roll of ribbon – I used some ribbon I had laying around but you could also do a lace ribbon just make sure it is wide enough to cover your image
- A paint brush, scissors and a wet rag

To get started:
Find the images you want to use for each ornament. I put borders around each of my images so I had an easy guide to cut each photo. Export the photos you want to use into a file or on your desktop so you can find them all together in one file. Import them into a Word file and then make them small enough to fit on the back of the ornament. I held the ornament up to my computer screen to make sure the images where small enough to fit on the back of the ornament.

Select your images and add borders to them. Once you get all your images on your Word Doc. go ahead and print them out.
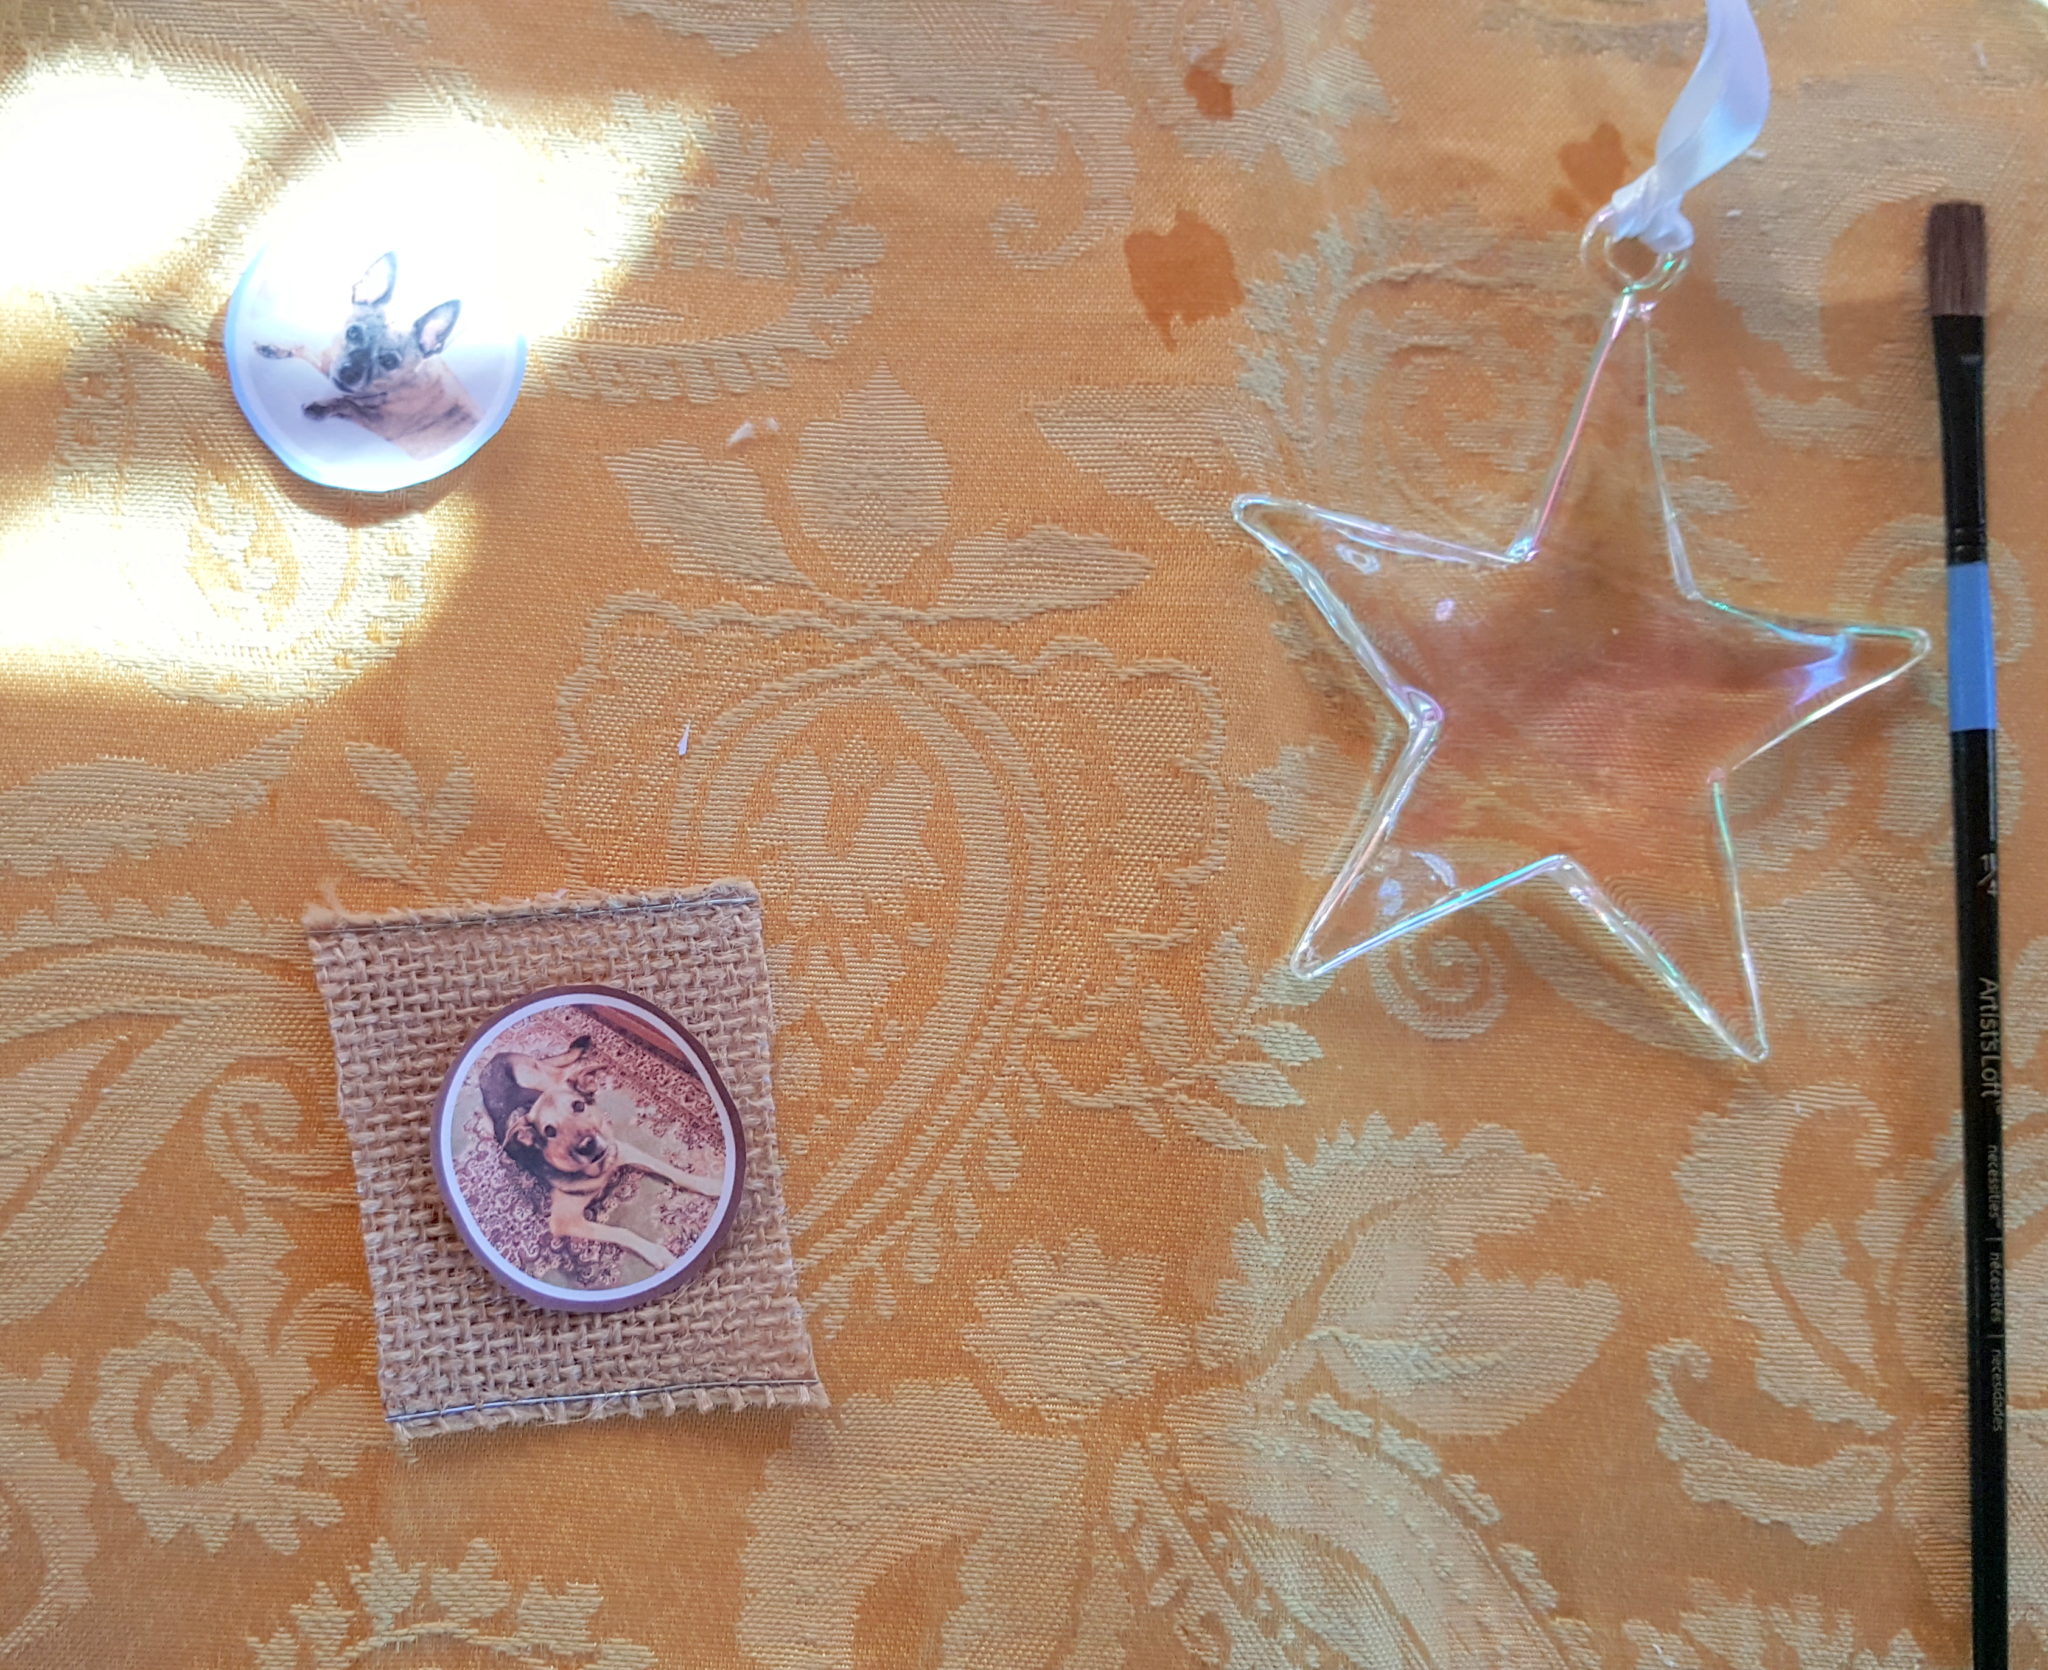
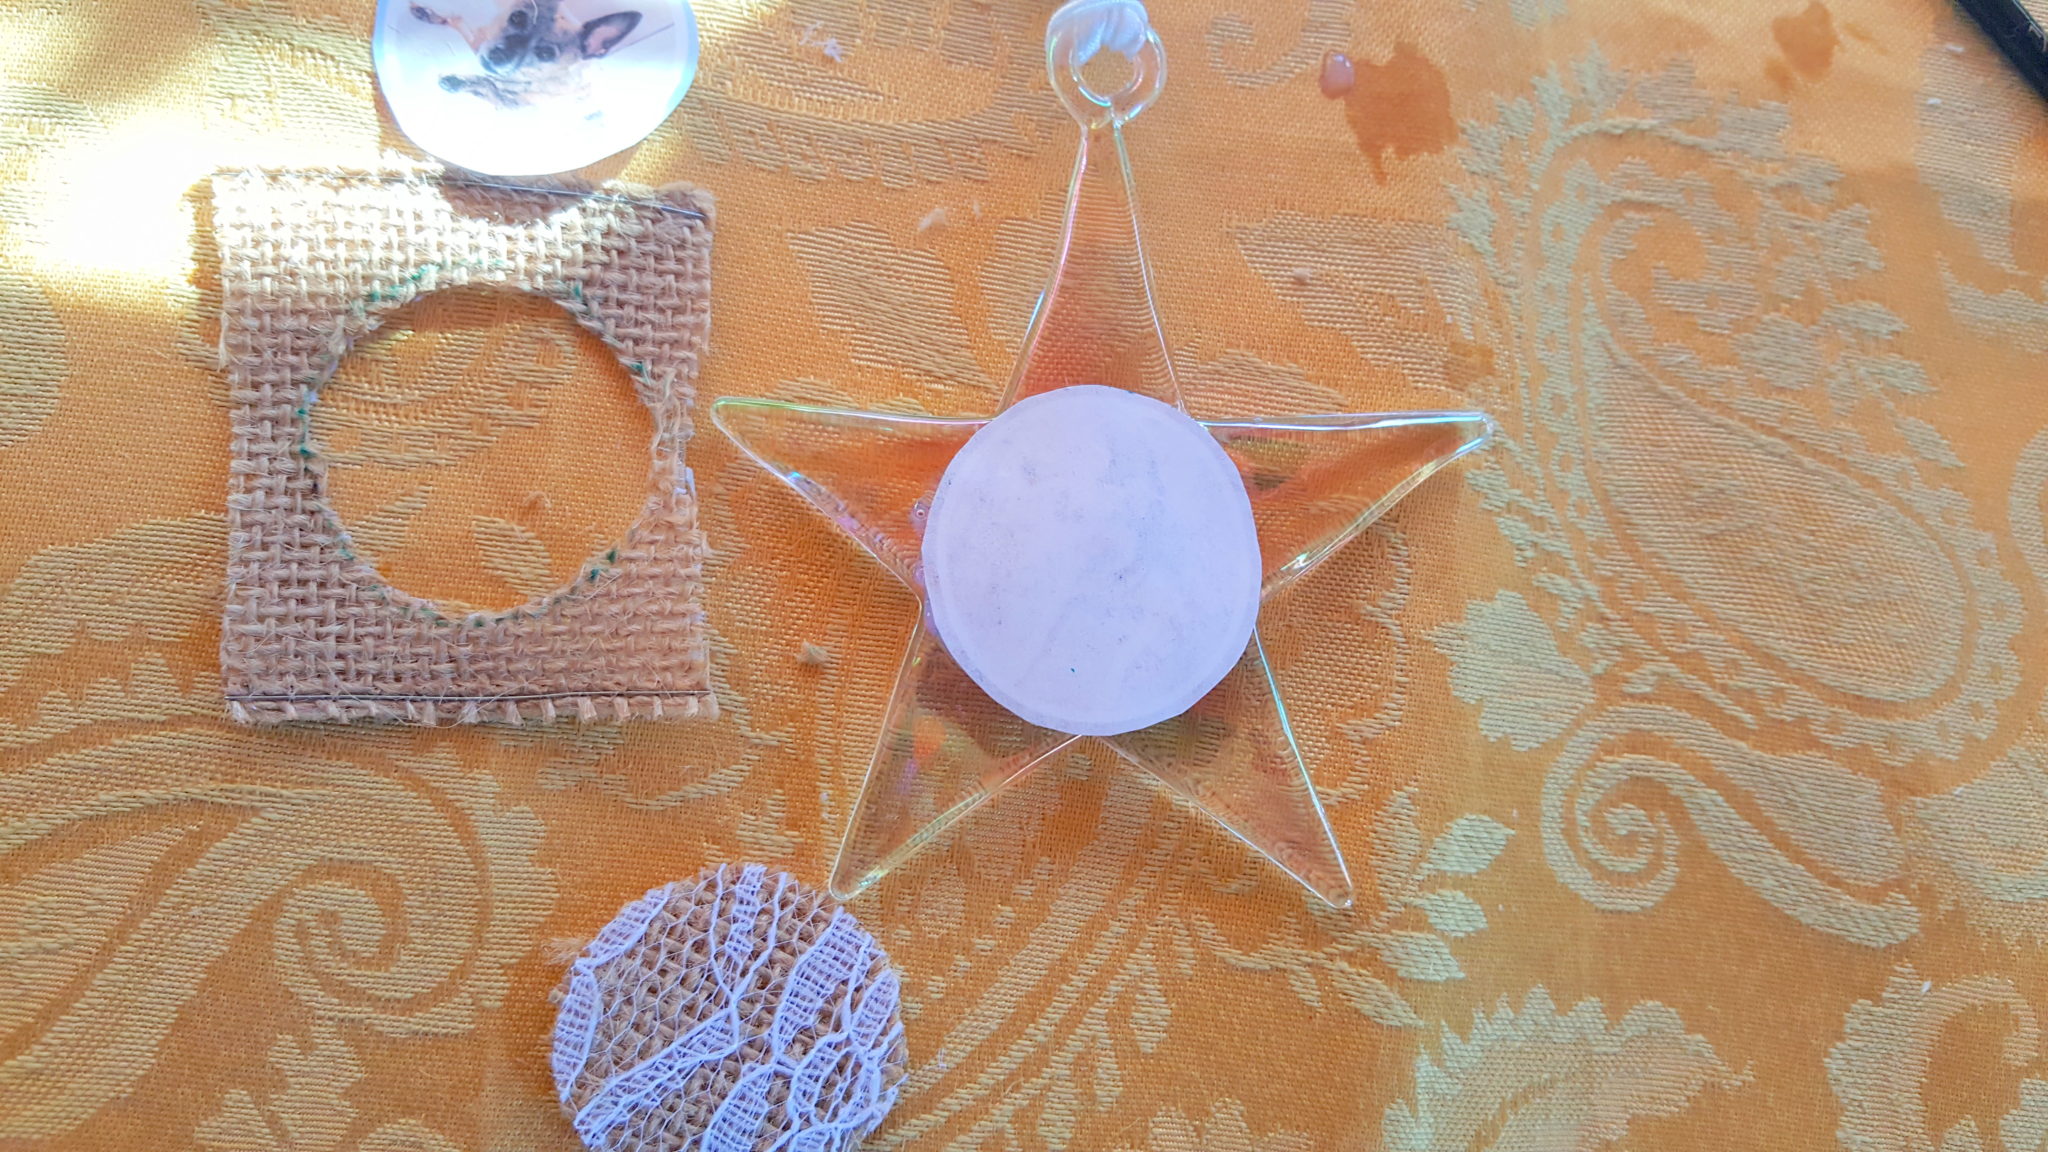
Cut your images out and have them ready to glaze on the back of the star ornament.
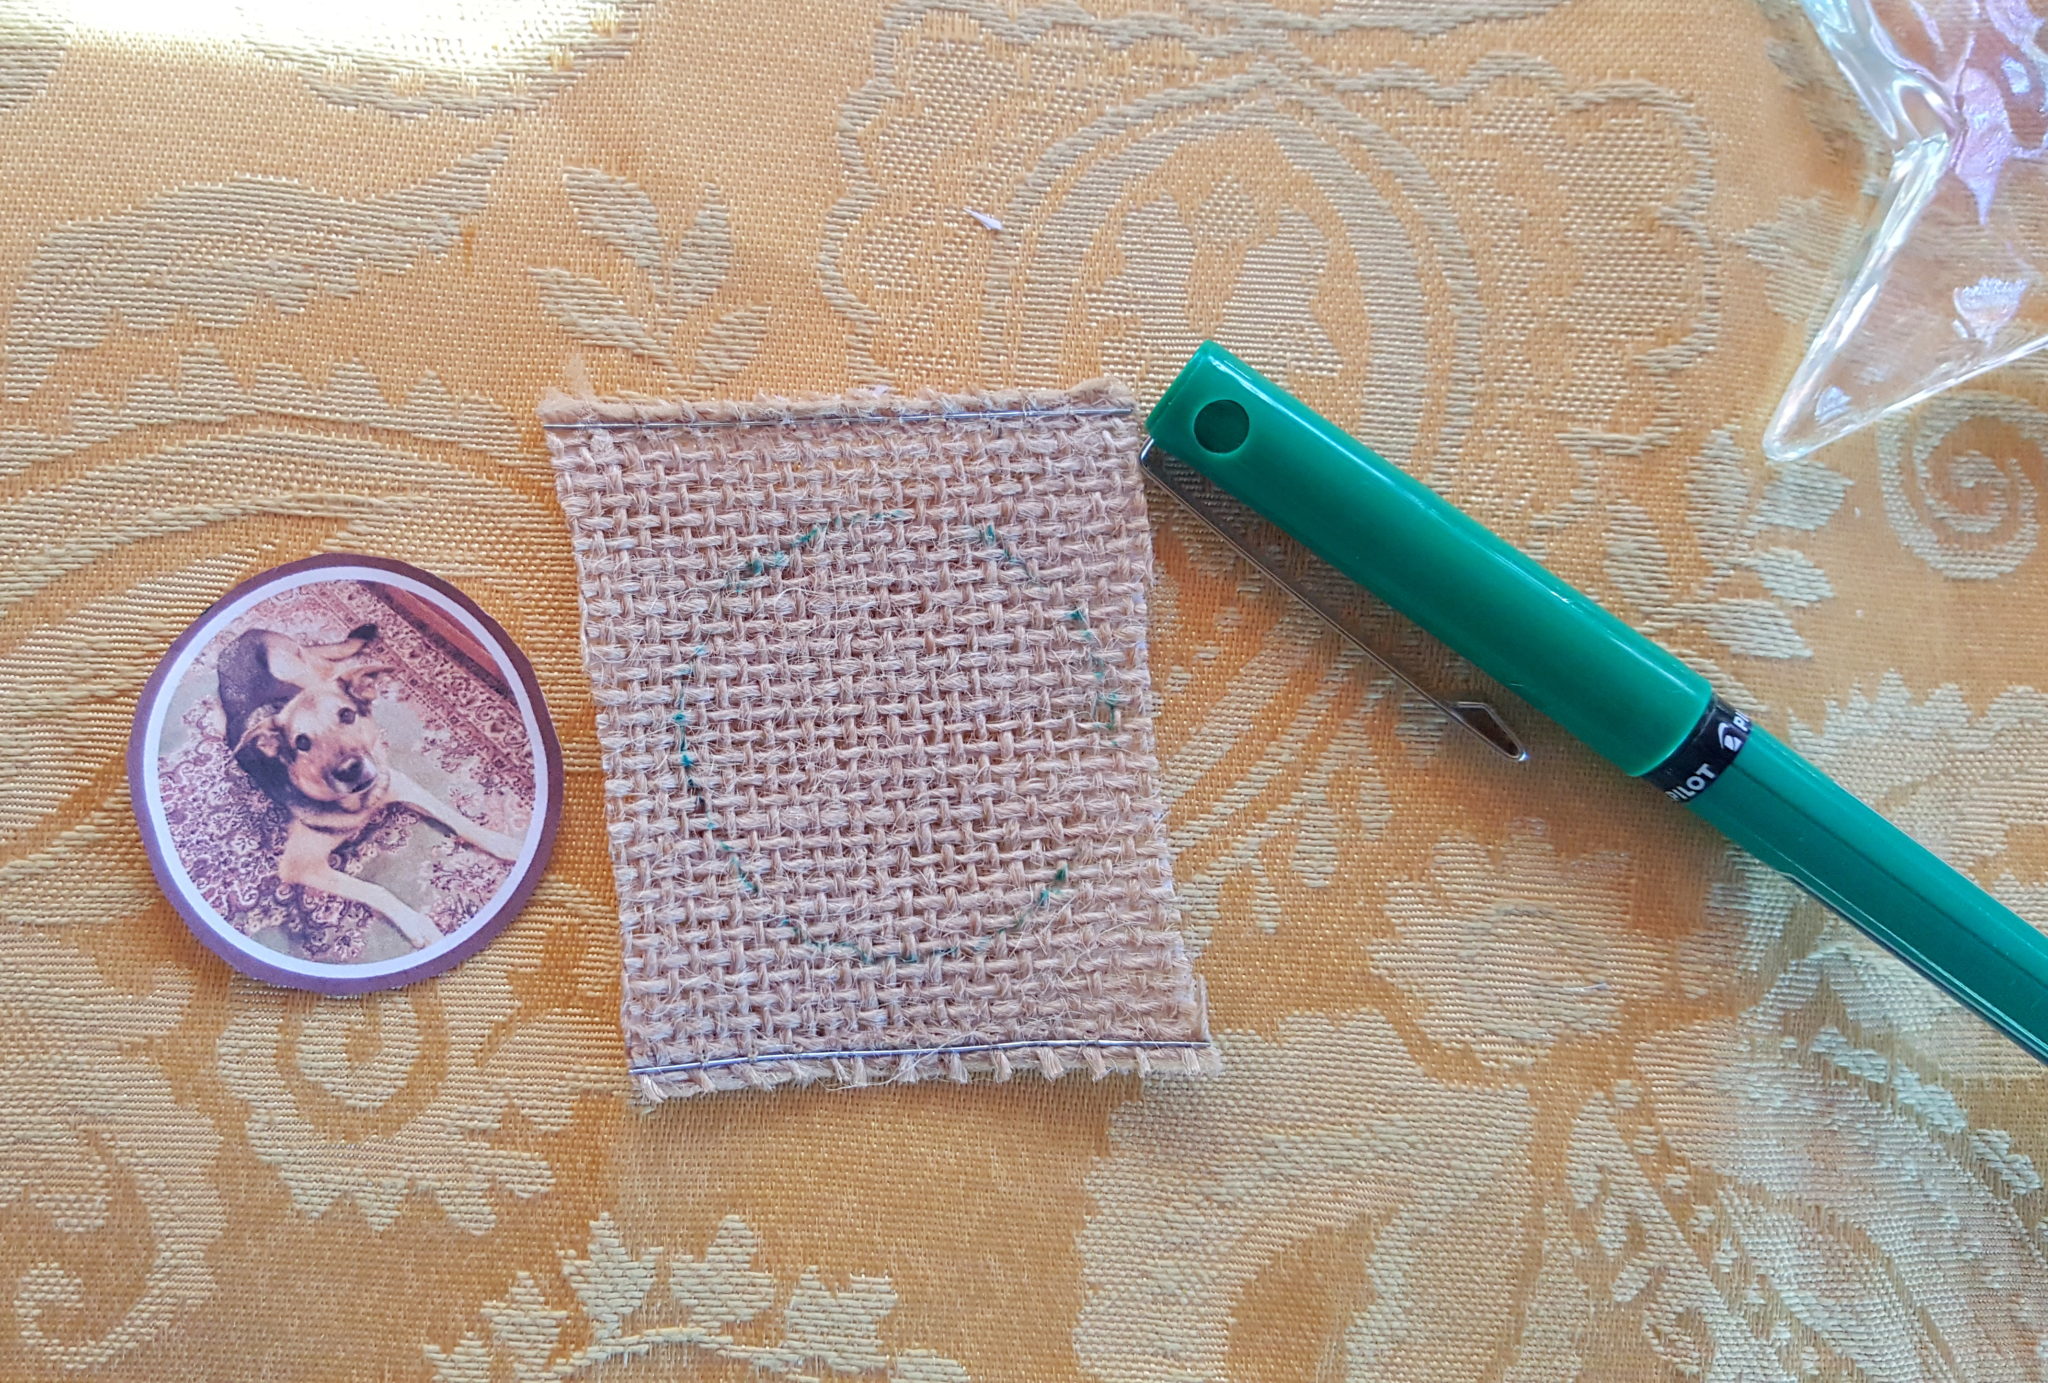
Flip the burlap ribbon (or use a pretty light colored white wrapping paper) over to the wrong side (so the lace is face down) and trace your image. Be very careful not to get ink on your image (turn you image over when you are tracing it so if you make a mistake with the pen you won’t be able to see your mistake).
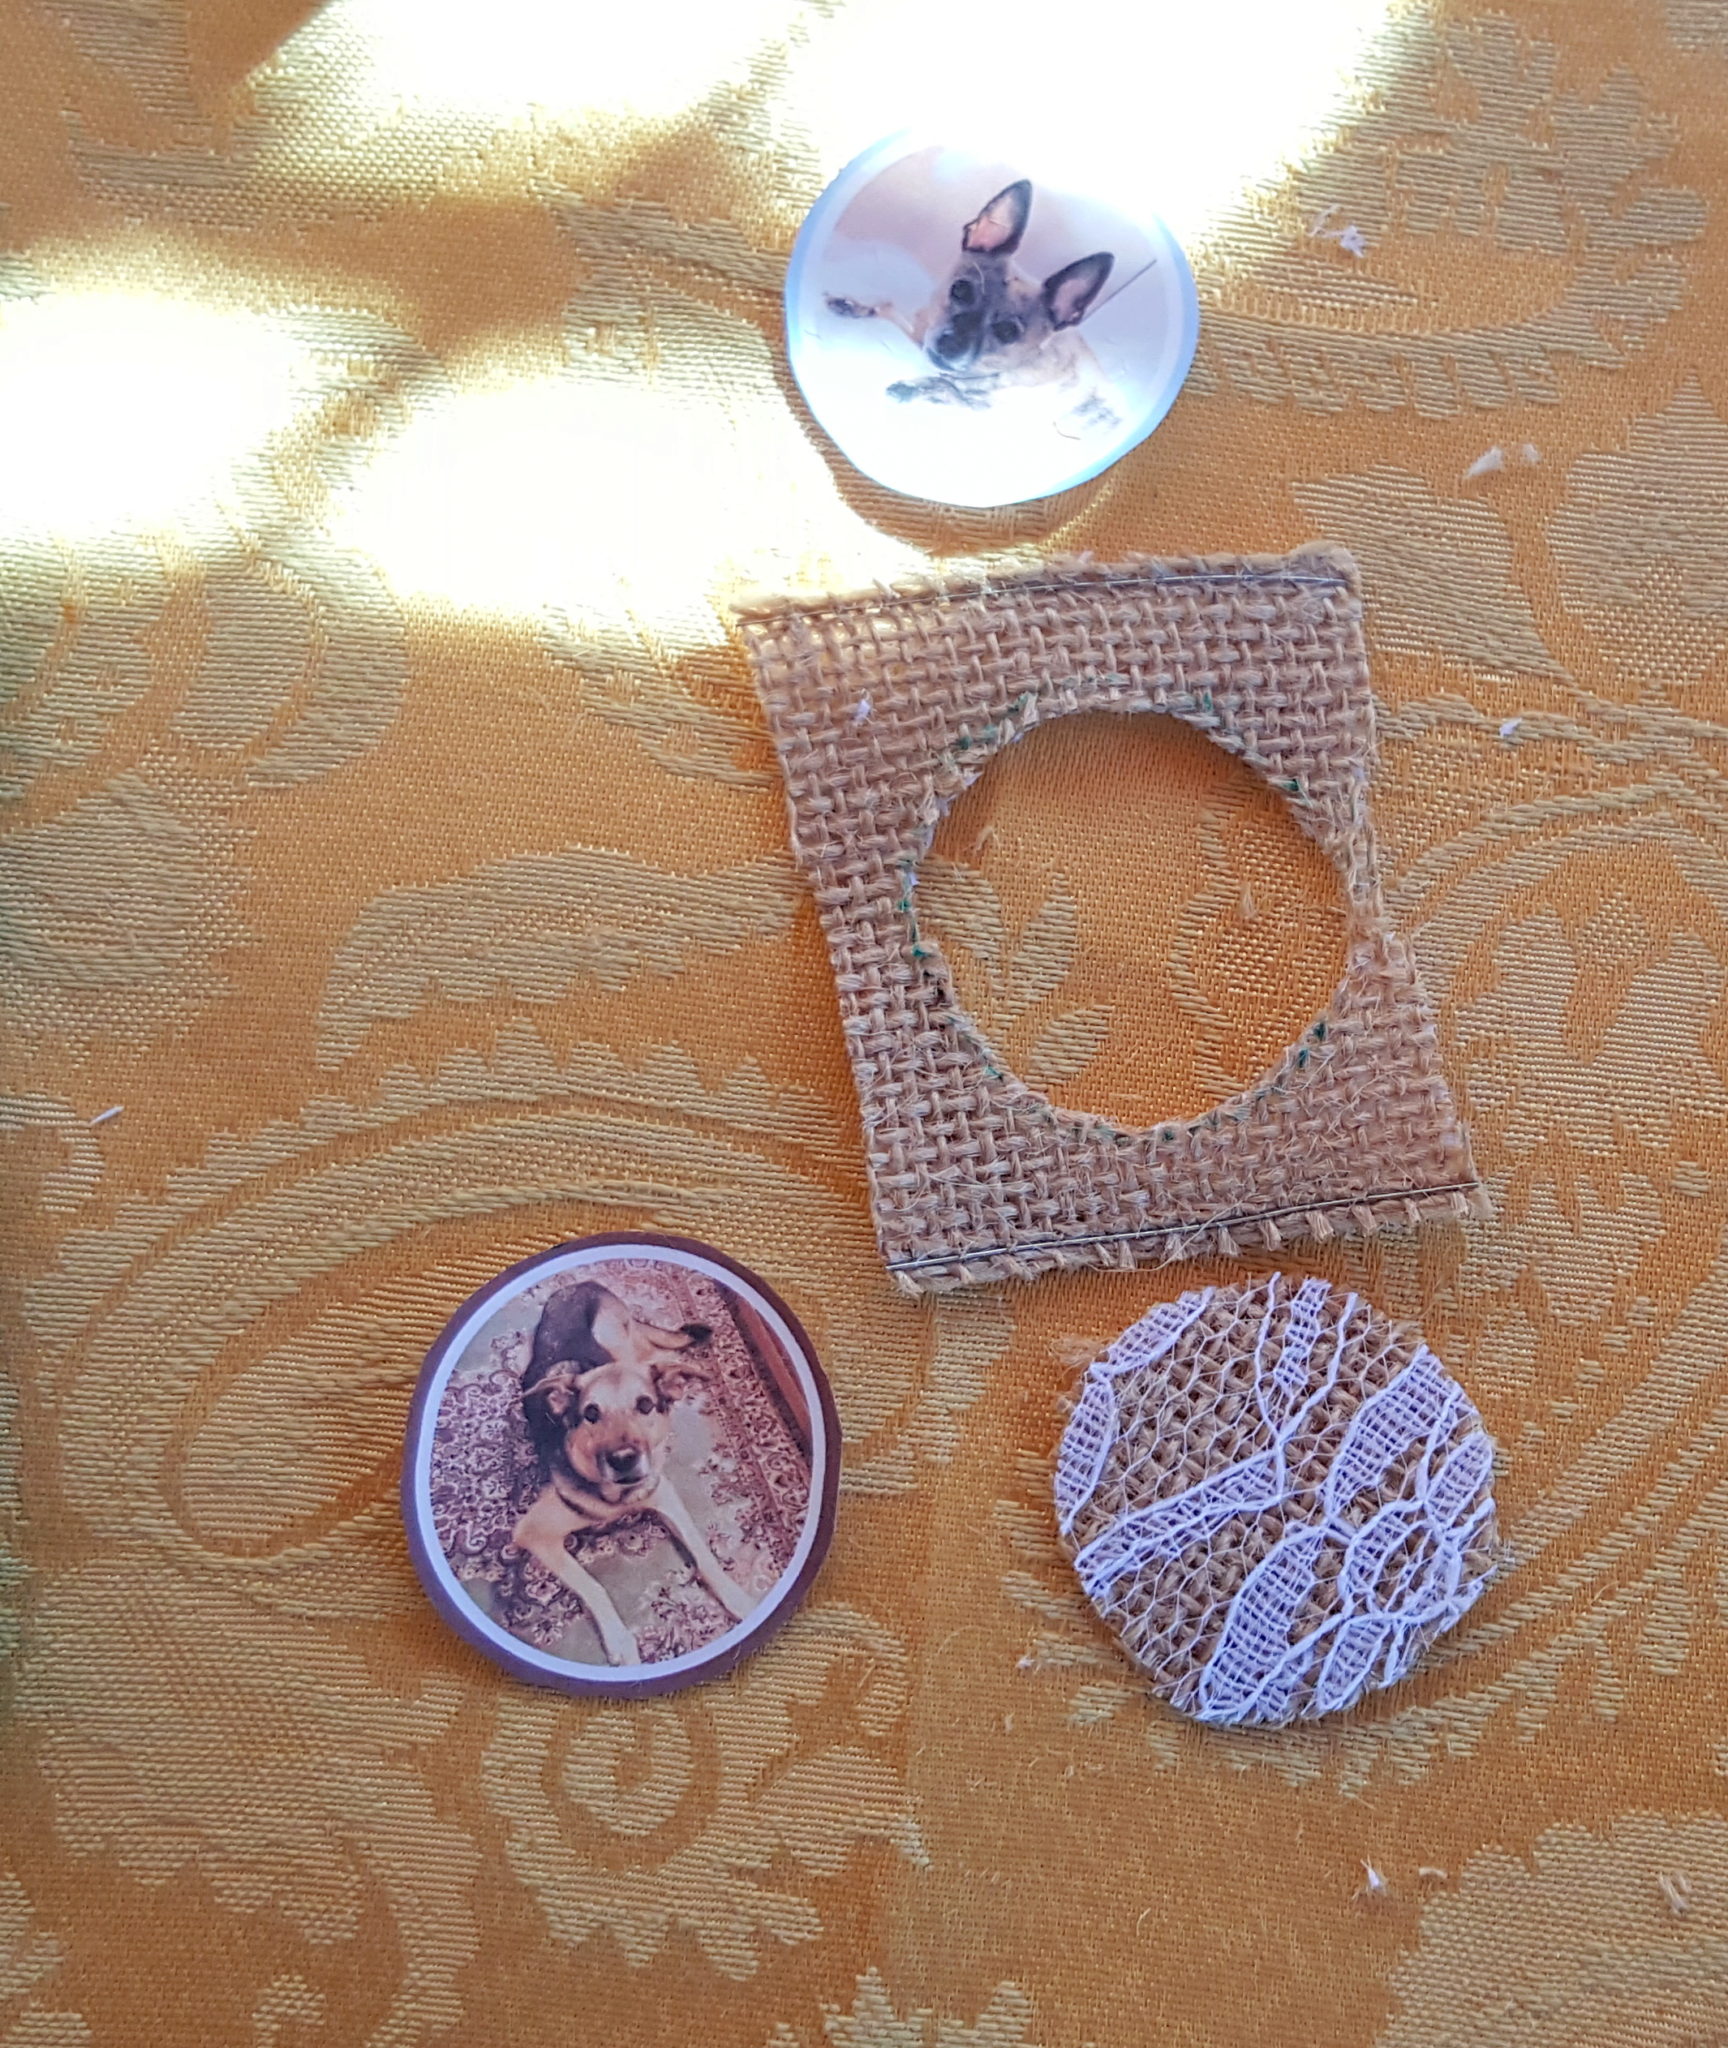

Once your ribbon is cut be sure to hold it up to your image to make sure the ribbon doesn’t show behind your image once it is placed on top of your image. Trim very carefully if needed.
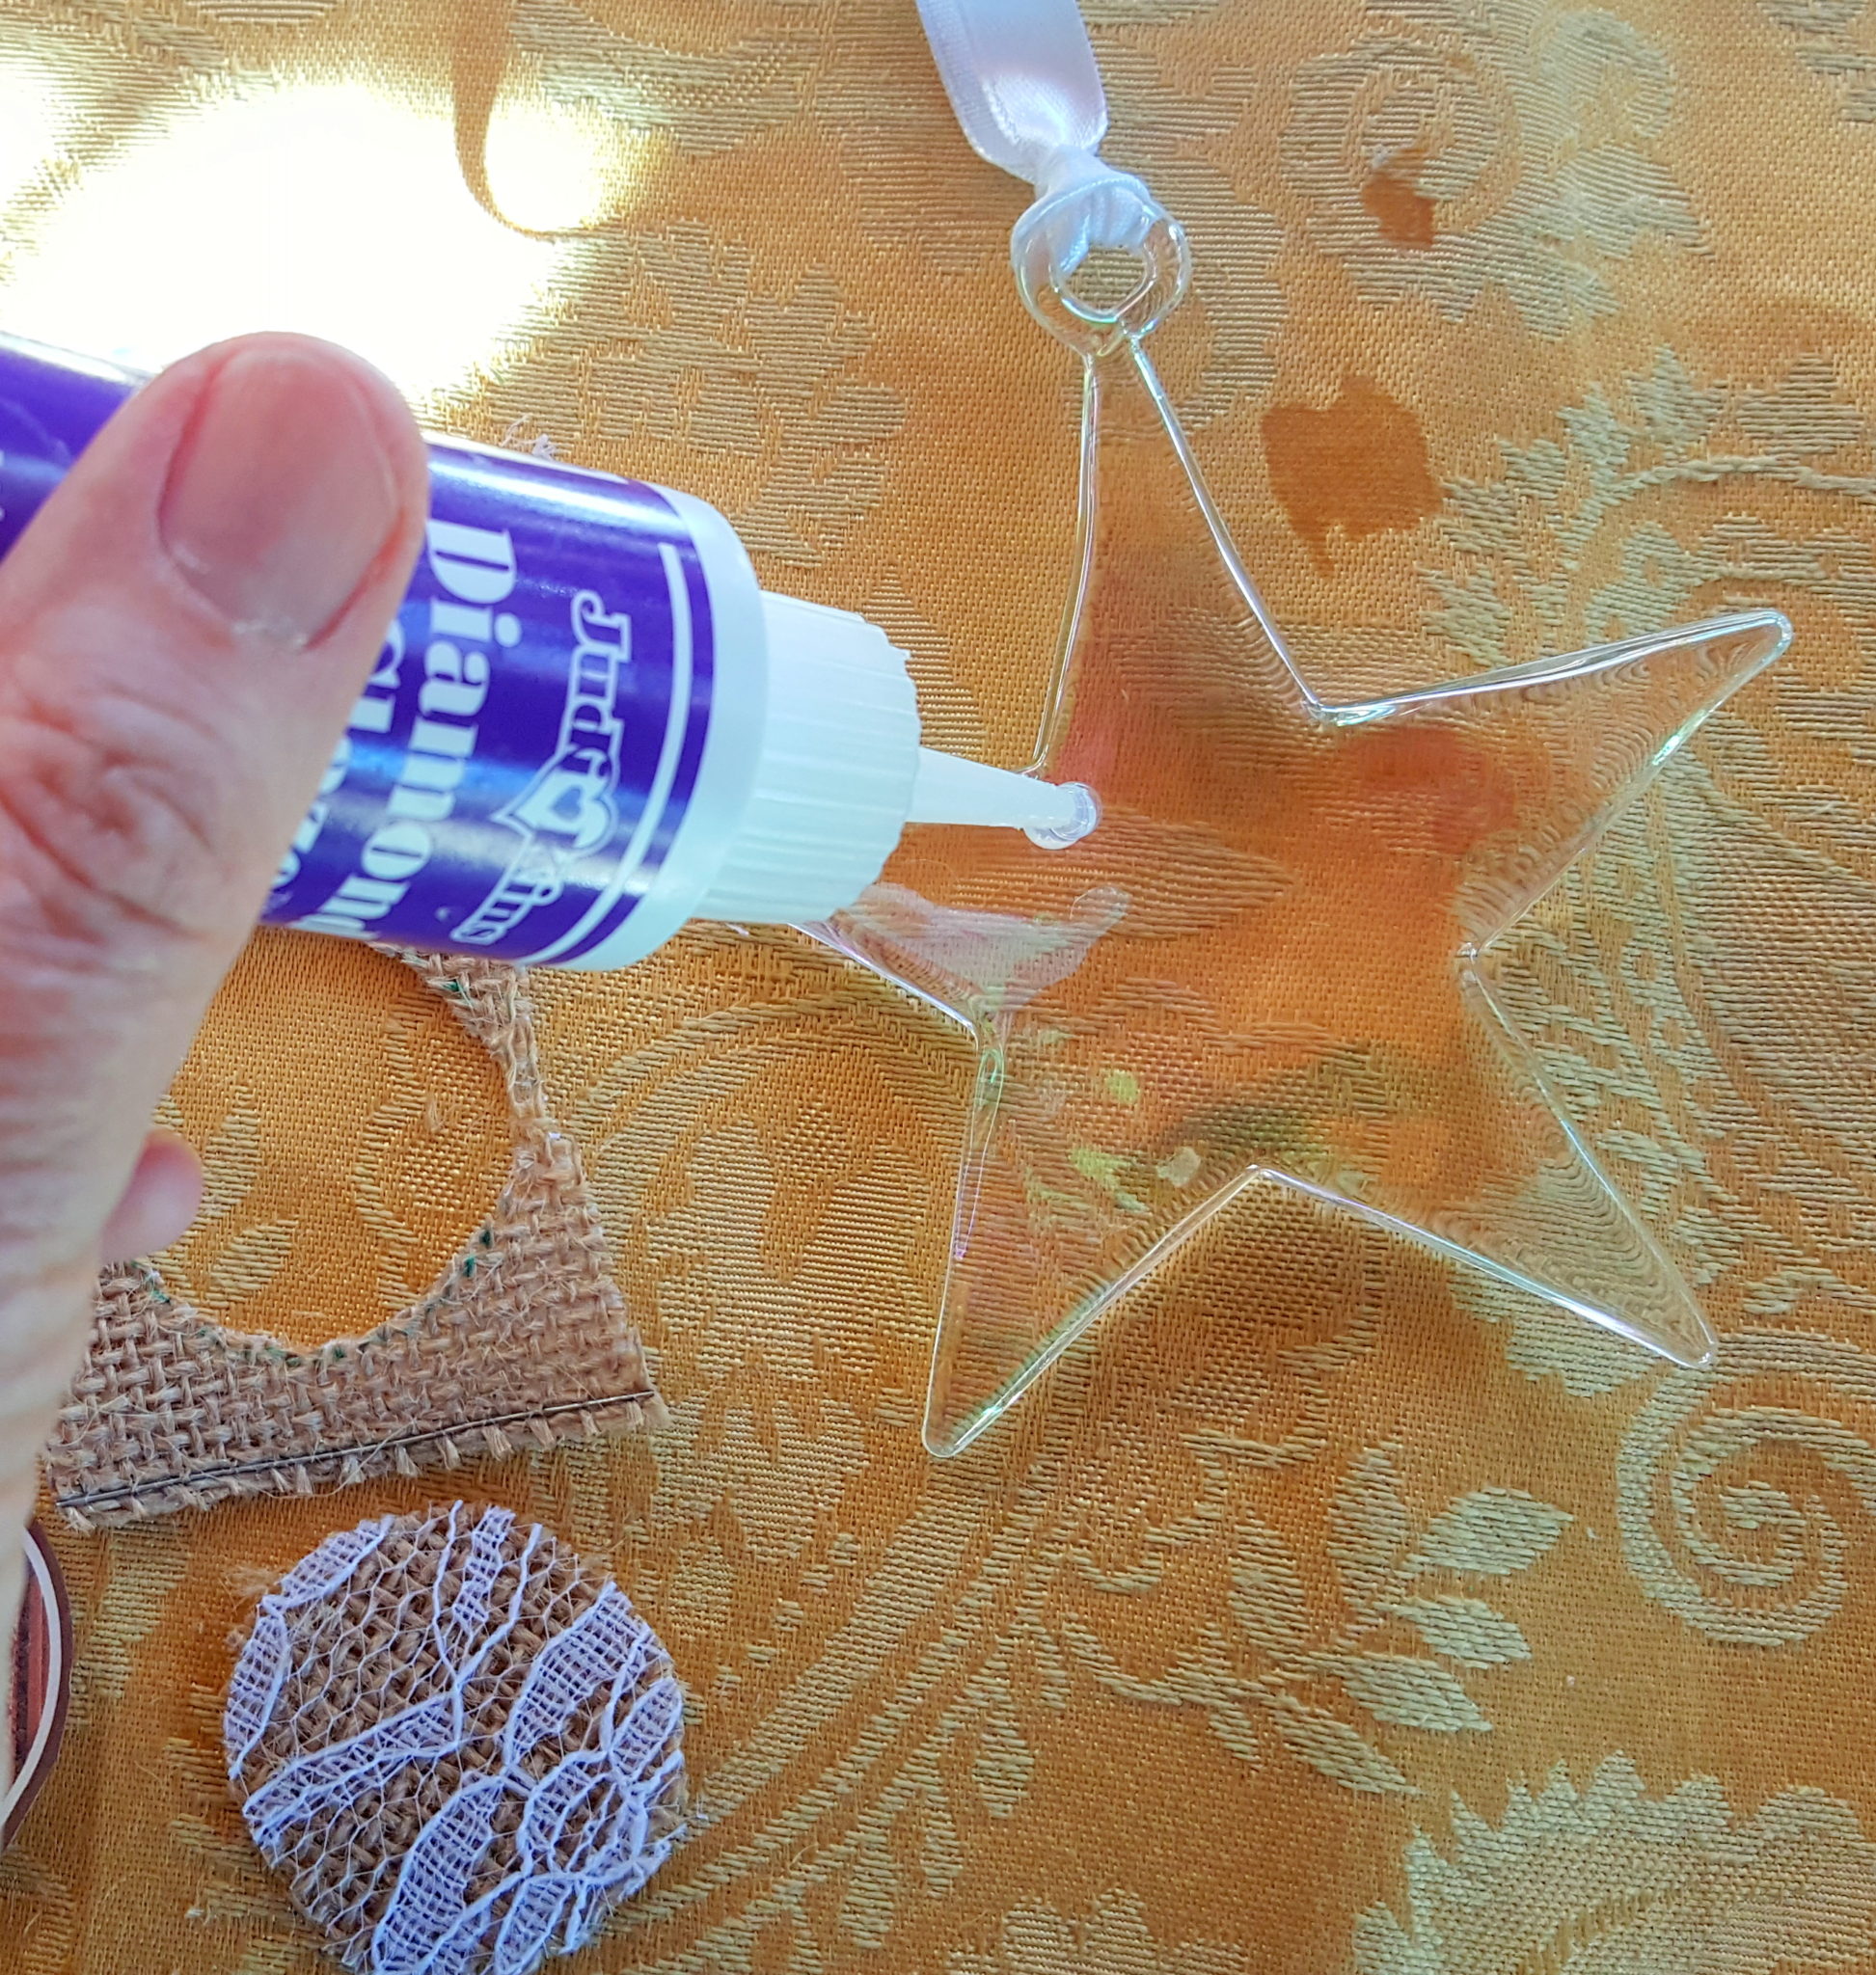
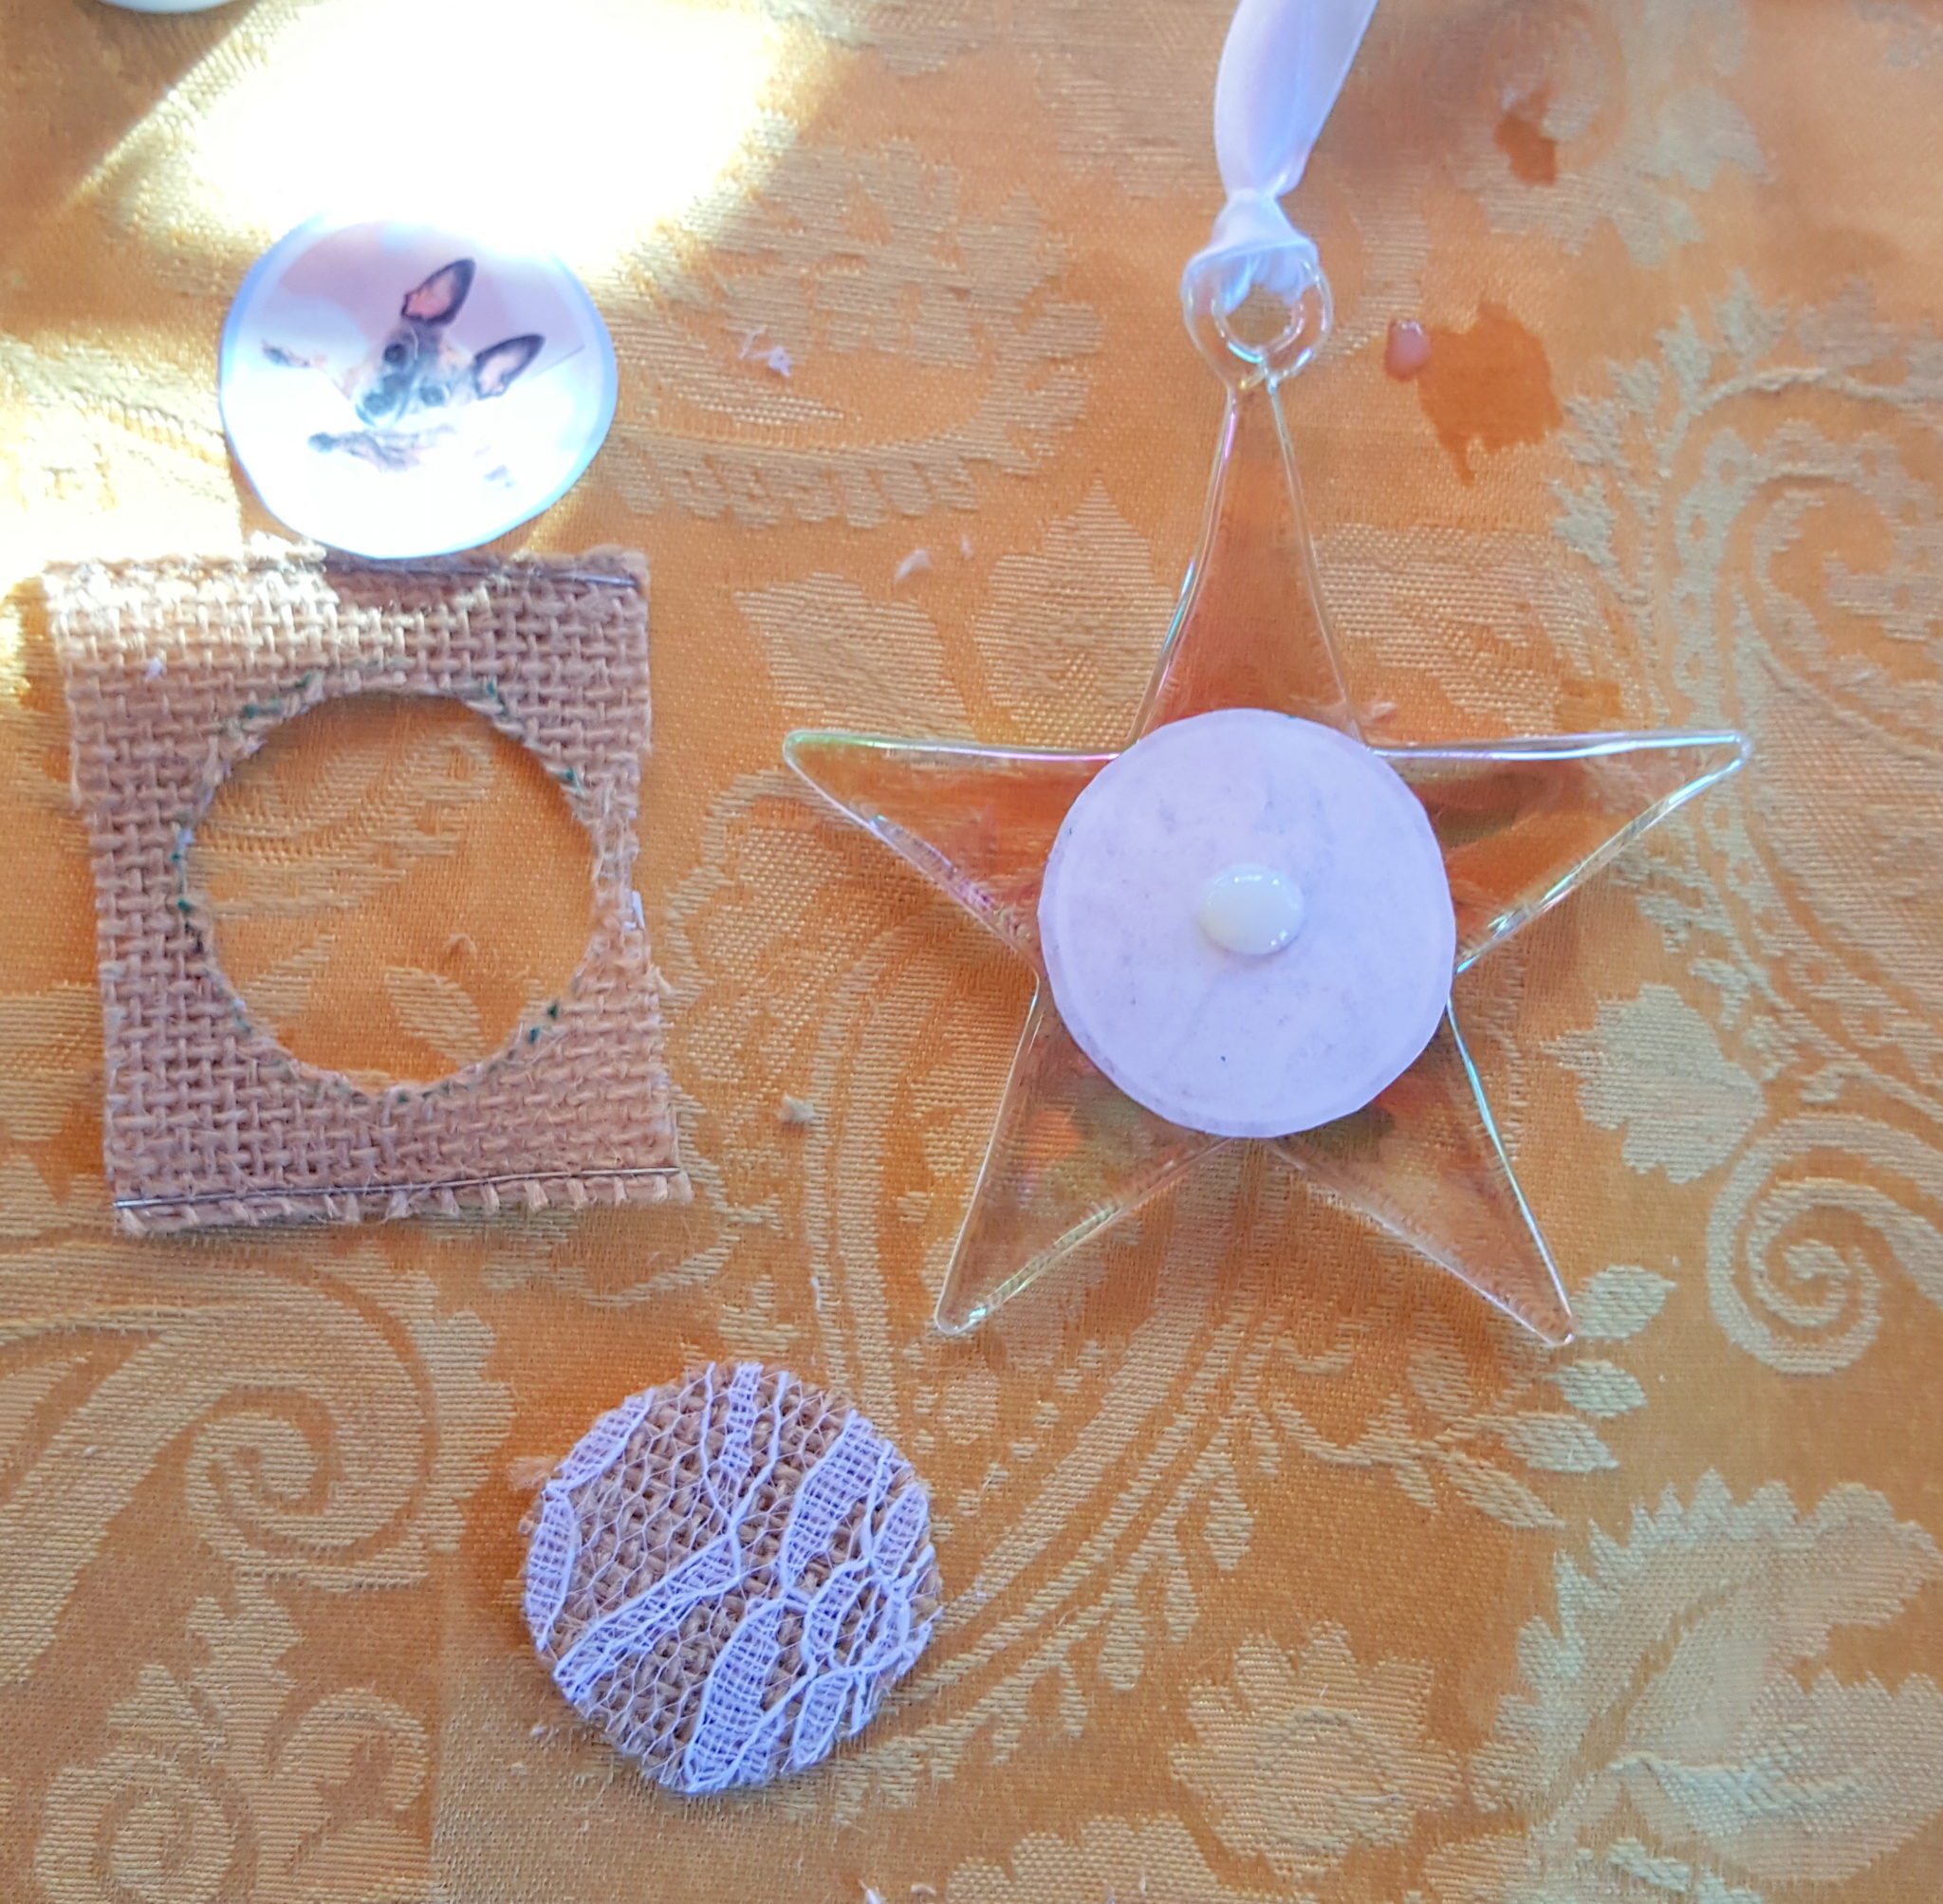
Add a very small dot of Diamond Glaze to your star ornament or Mod Podge

Take your paint brush and spread the glaze out in a circle.
Put your image on top of the glaze right away.
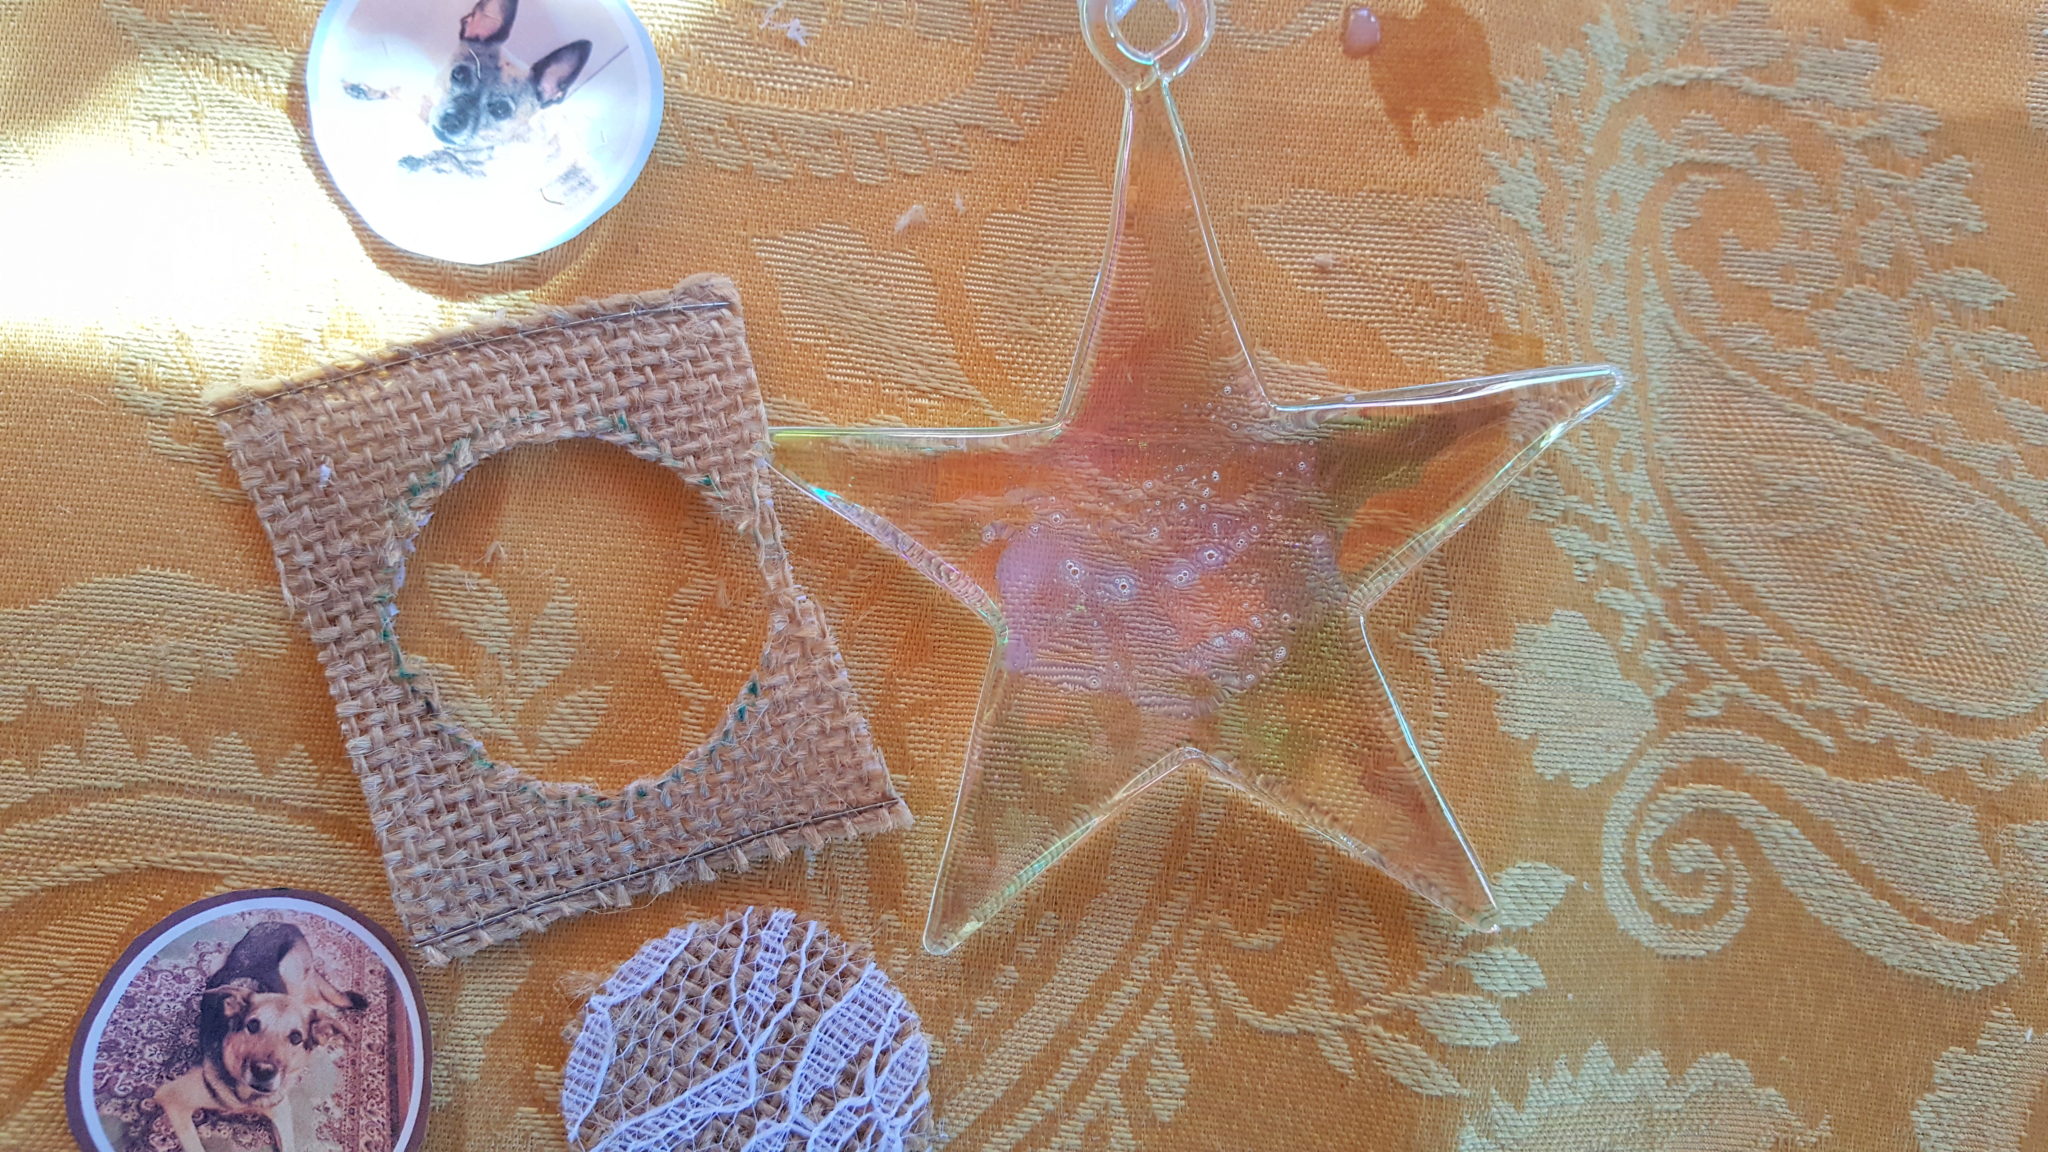
Be sure to press hard and get all the air bubbles out of your image by starting to press down in the middle and press all the air bubbles out to the edge of the photo and out the side. Use the palm of your hand to press down hard on the entire image once you think all the air bubbles are out from under your image.
Next, put a dot of glaze on your photo and press the ribbon (good side up) on top of the back of the image and press down hard. You can also use a heavier Christmas wrapping paper and cut it out and put the good side up and glaze it on tome of the back of the photo (after it has dried).
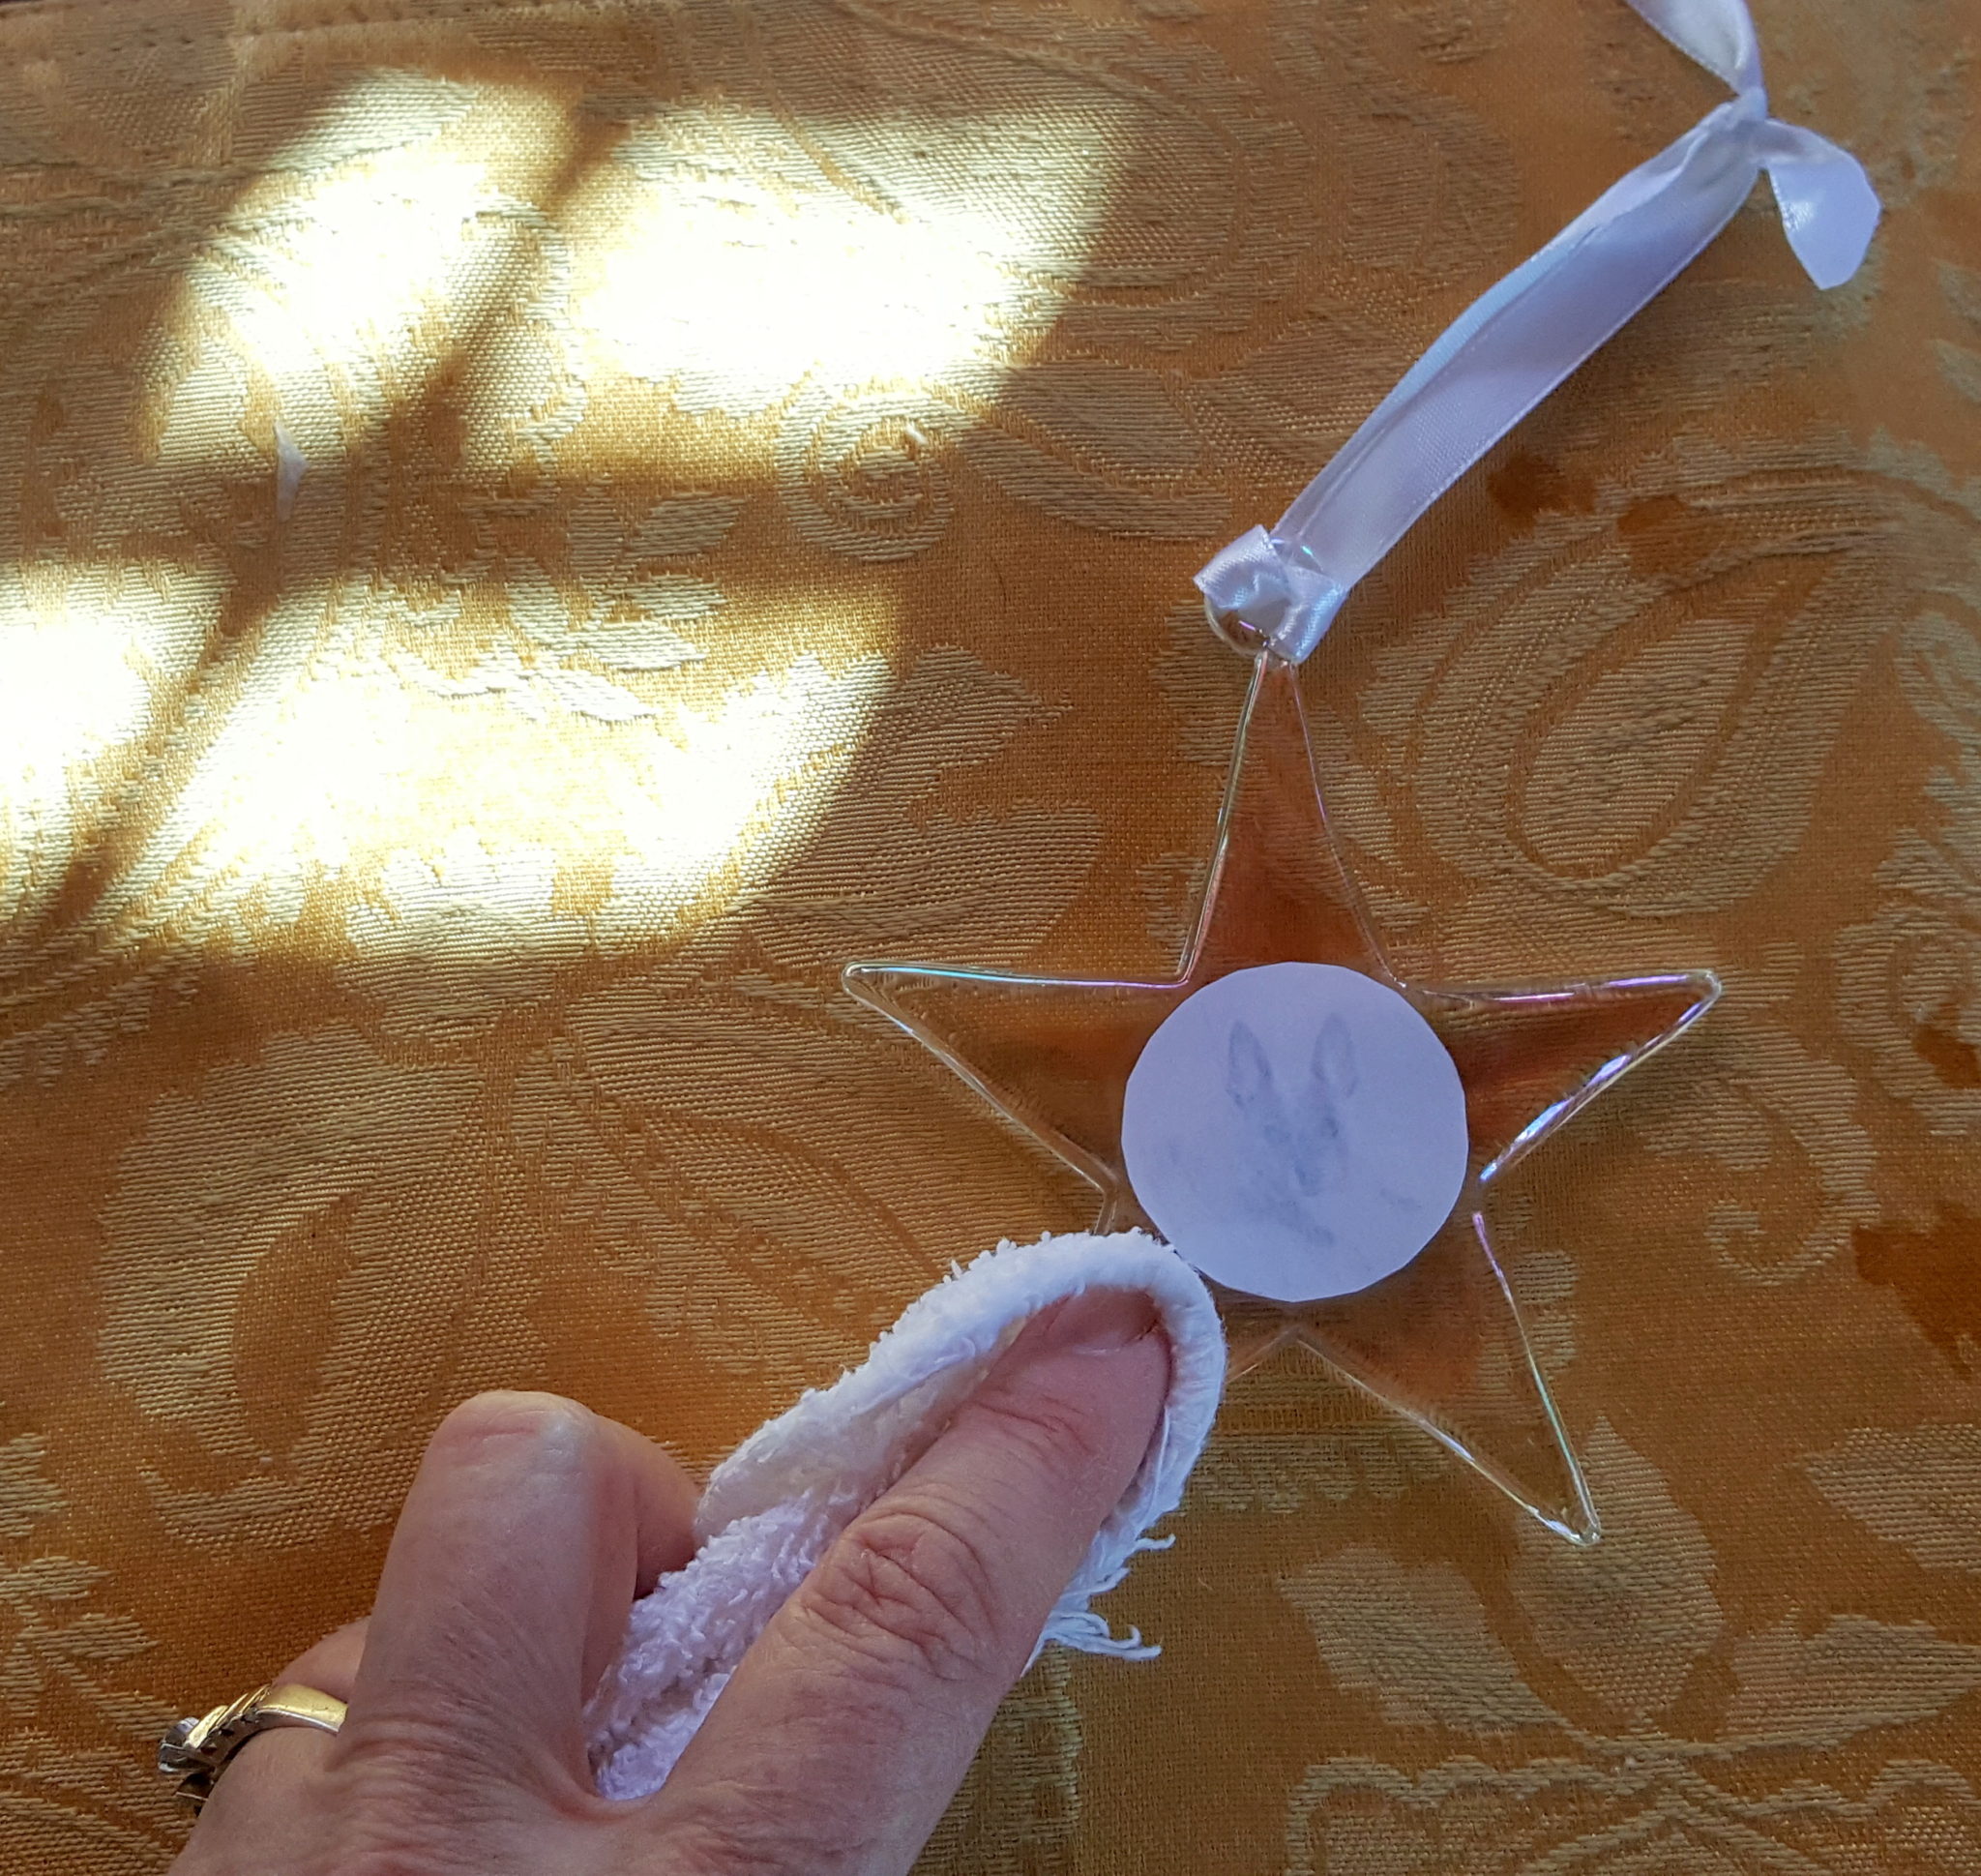
Be sure to have a damp wash cloth handy with warm water on it to wipe and dry all the glaze residue off the back and front of your new ornament before it dries. If you wait to long you may have to use a blade in which case you will have to scrap the dried glaze off very carefully so you do not scratch the surface of your ornament – It is best to clean the glaze off before it dries in between each step.
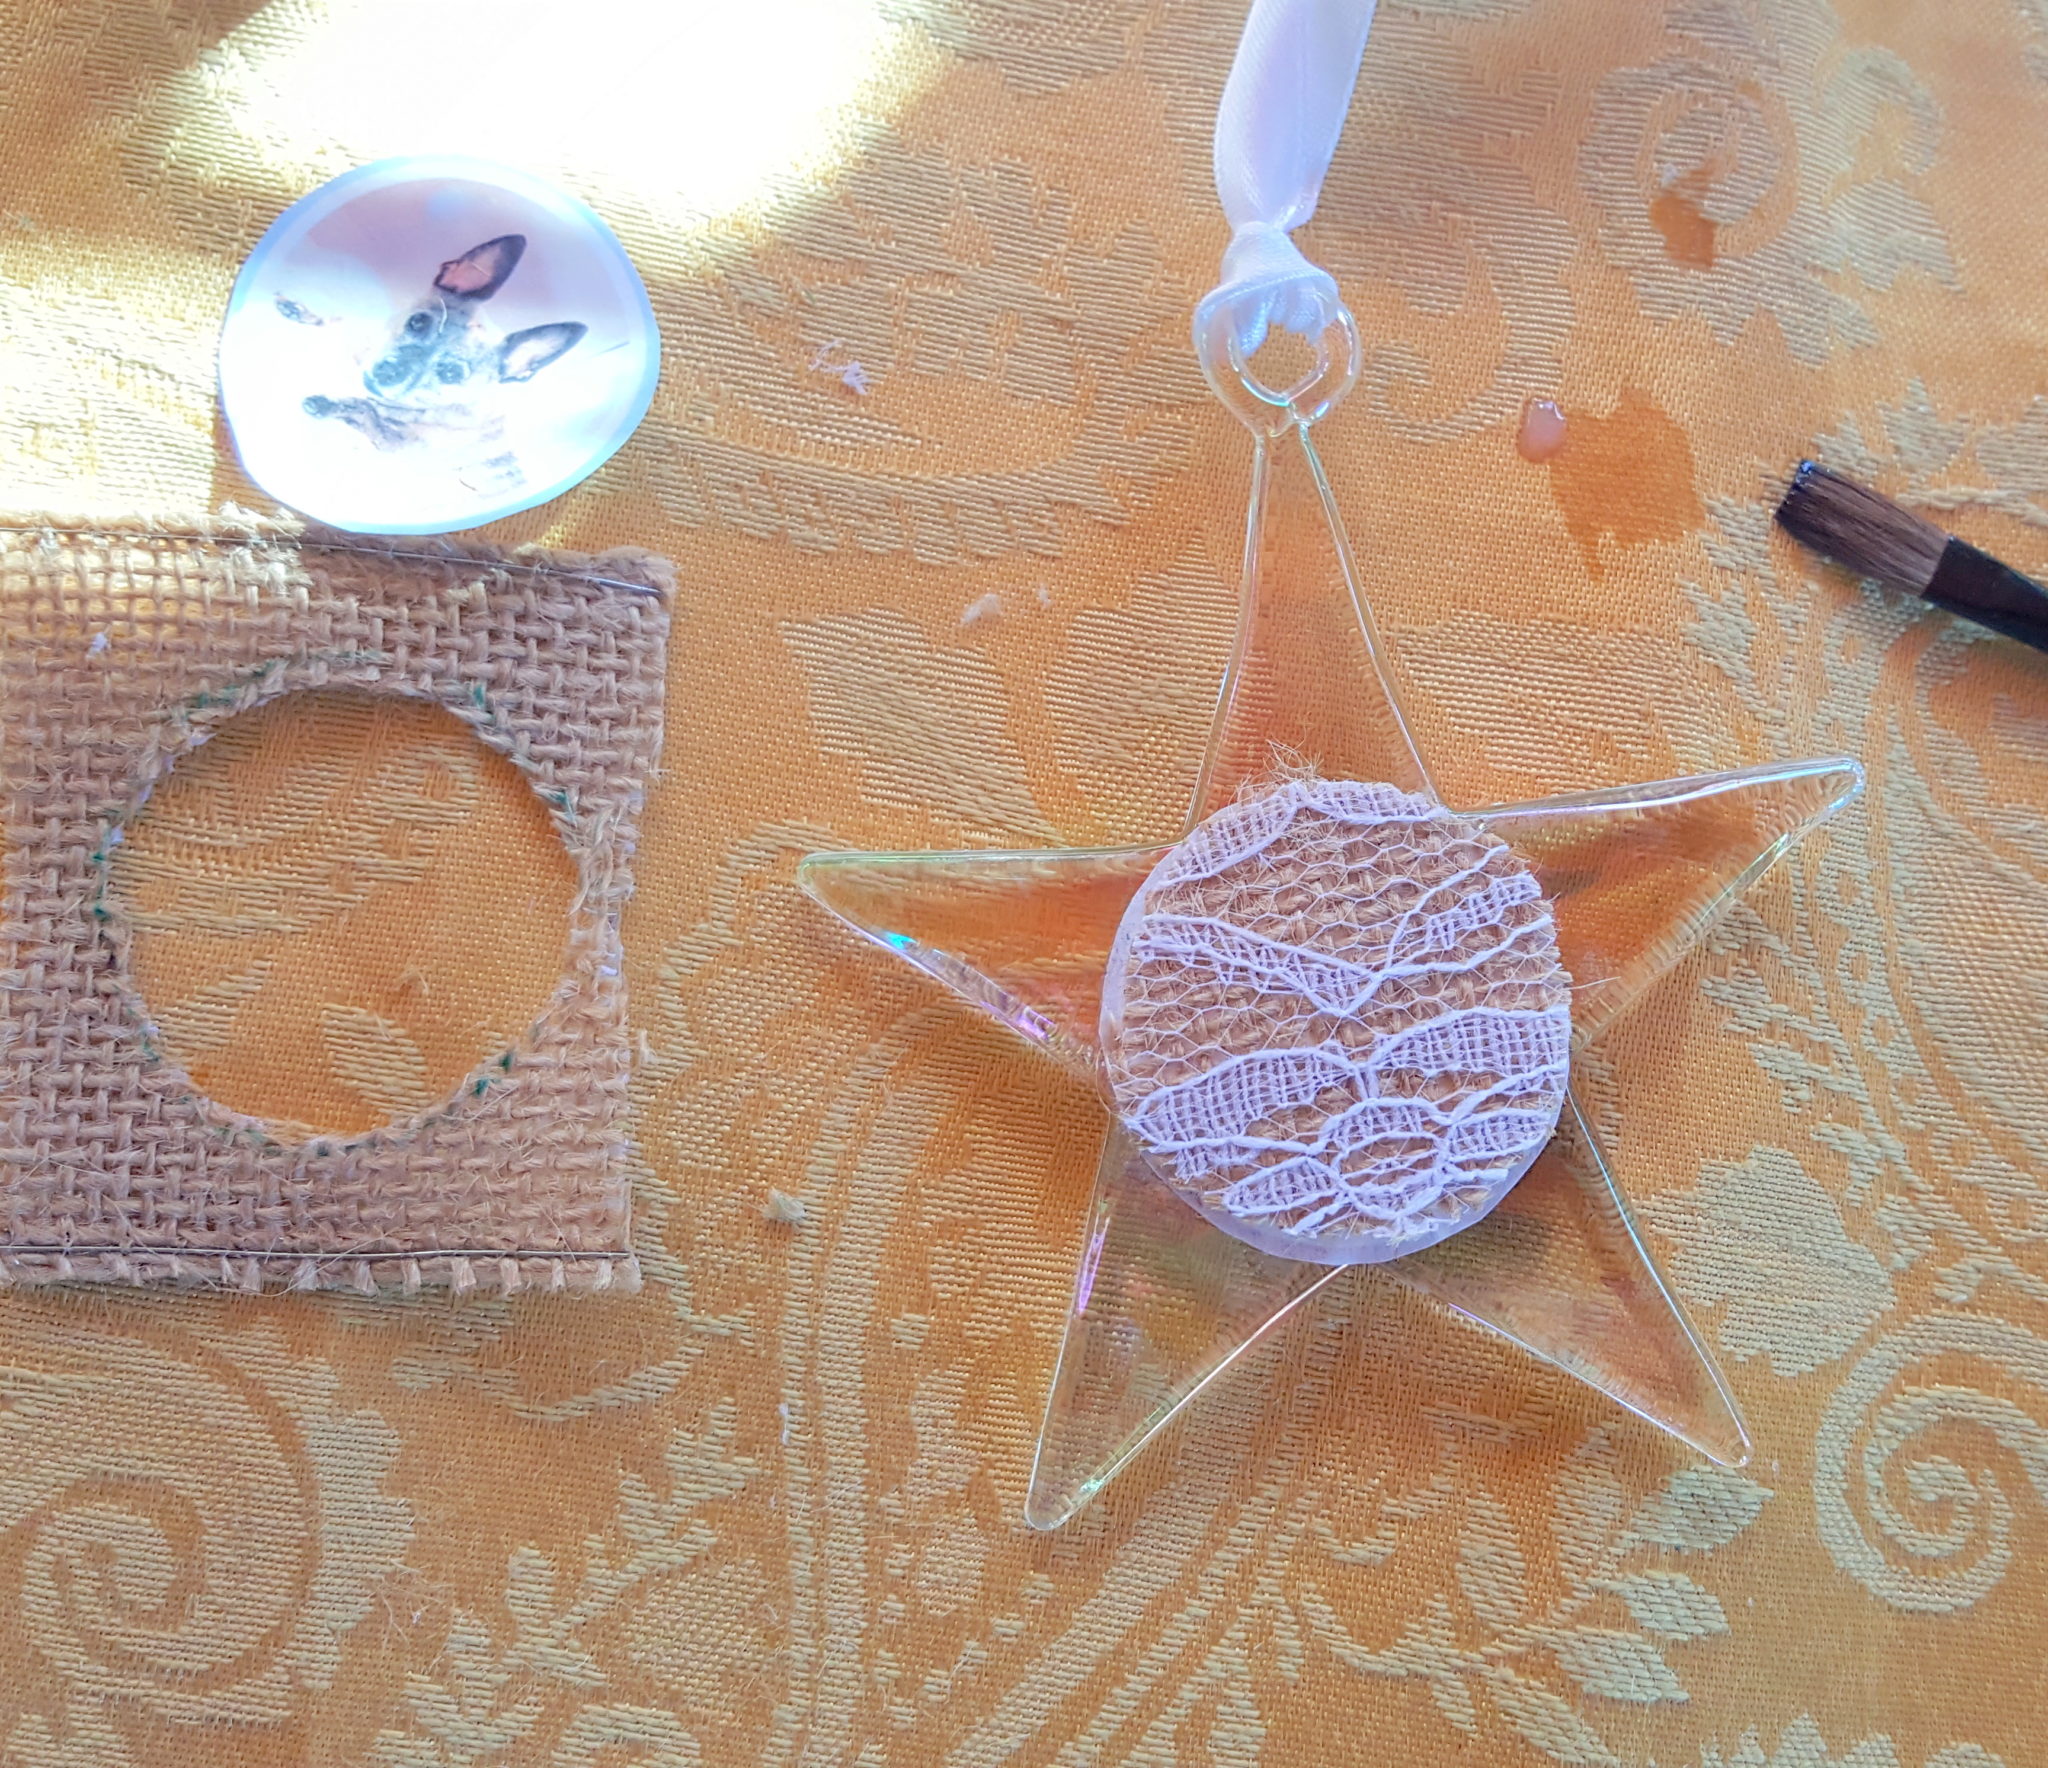
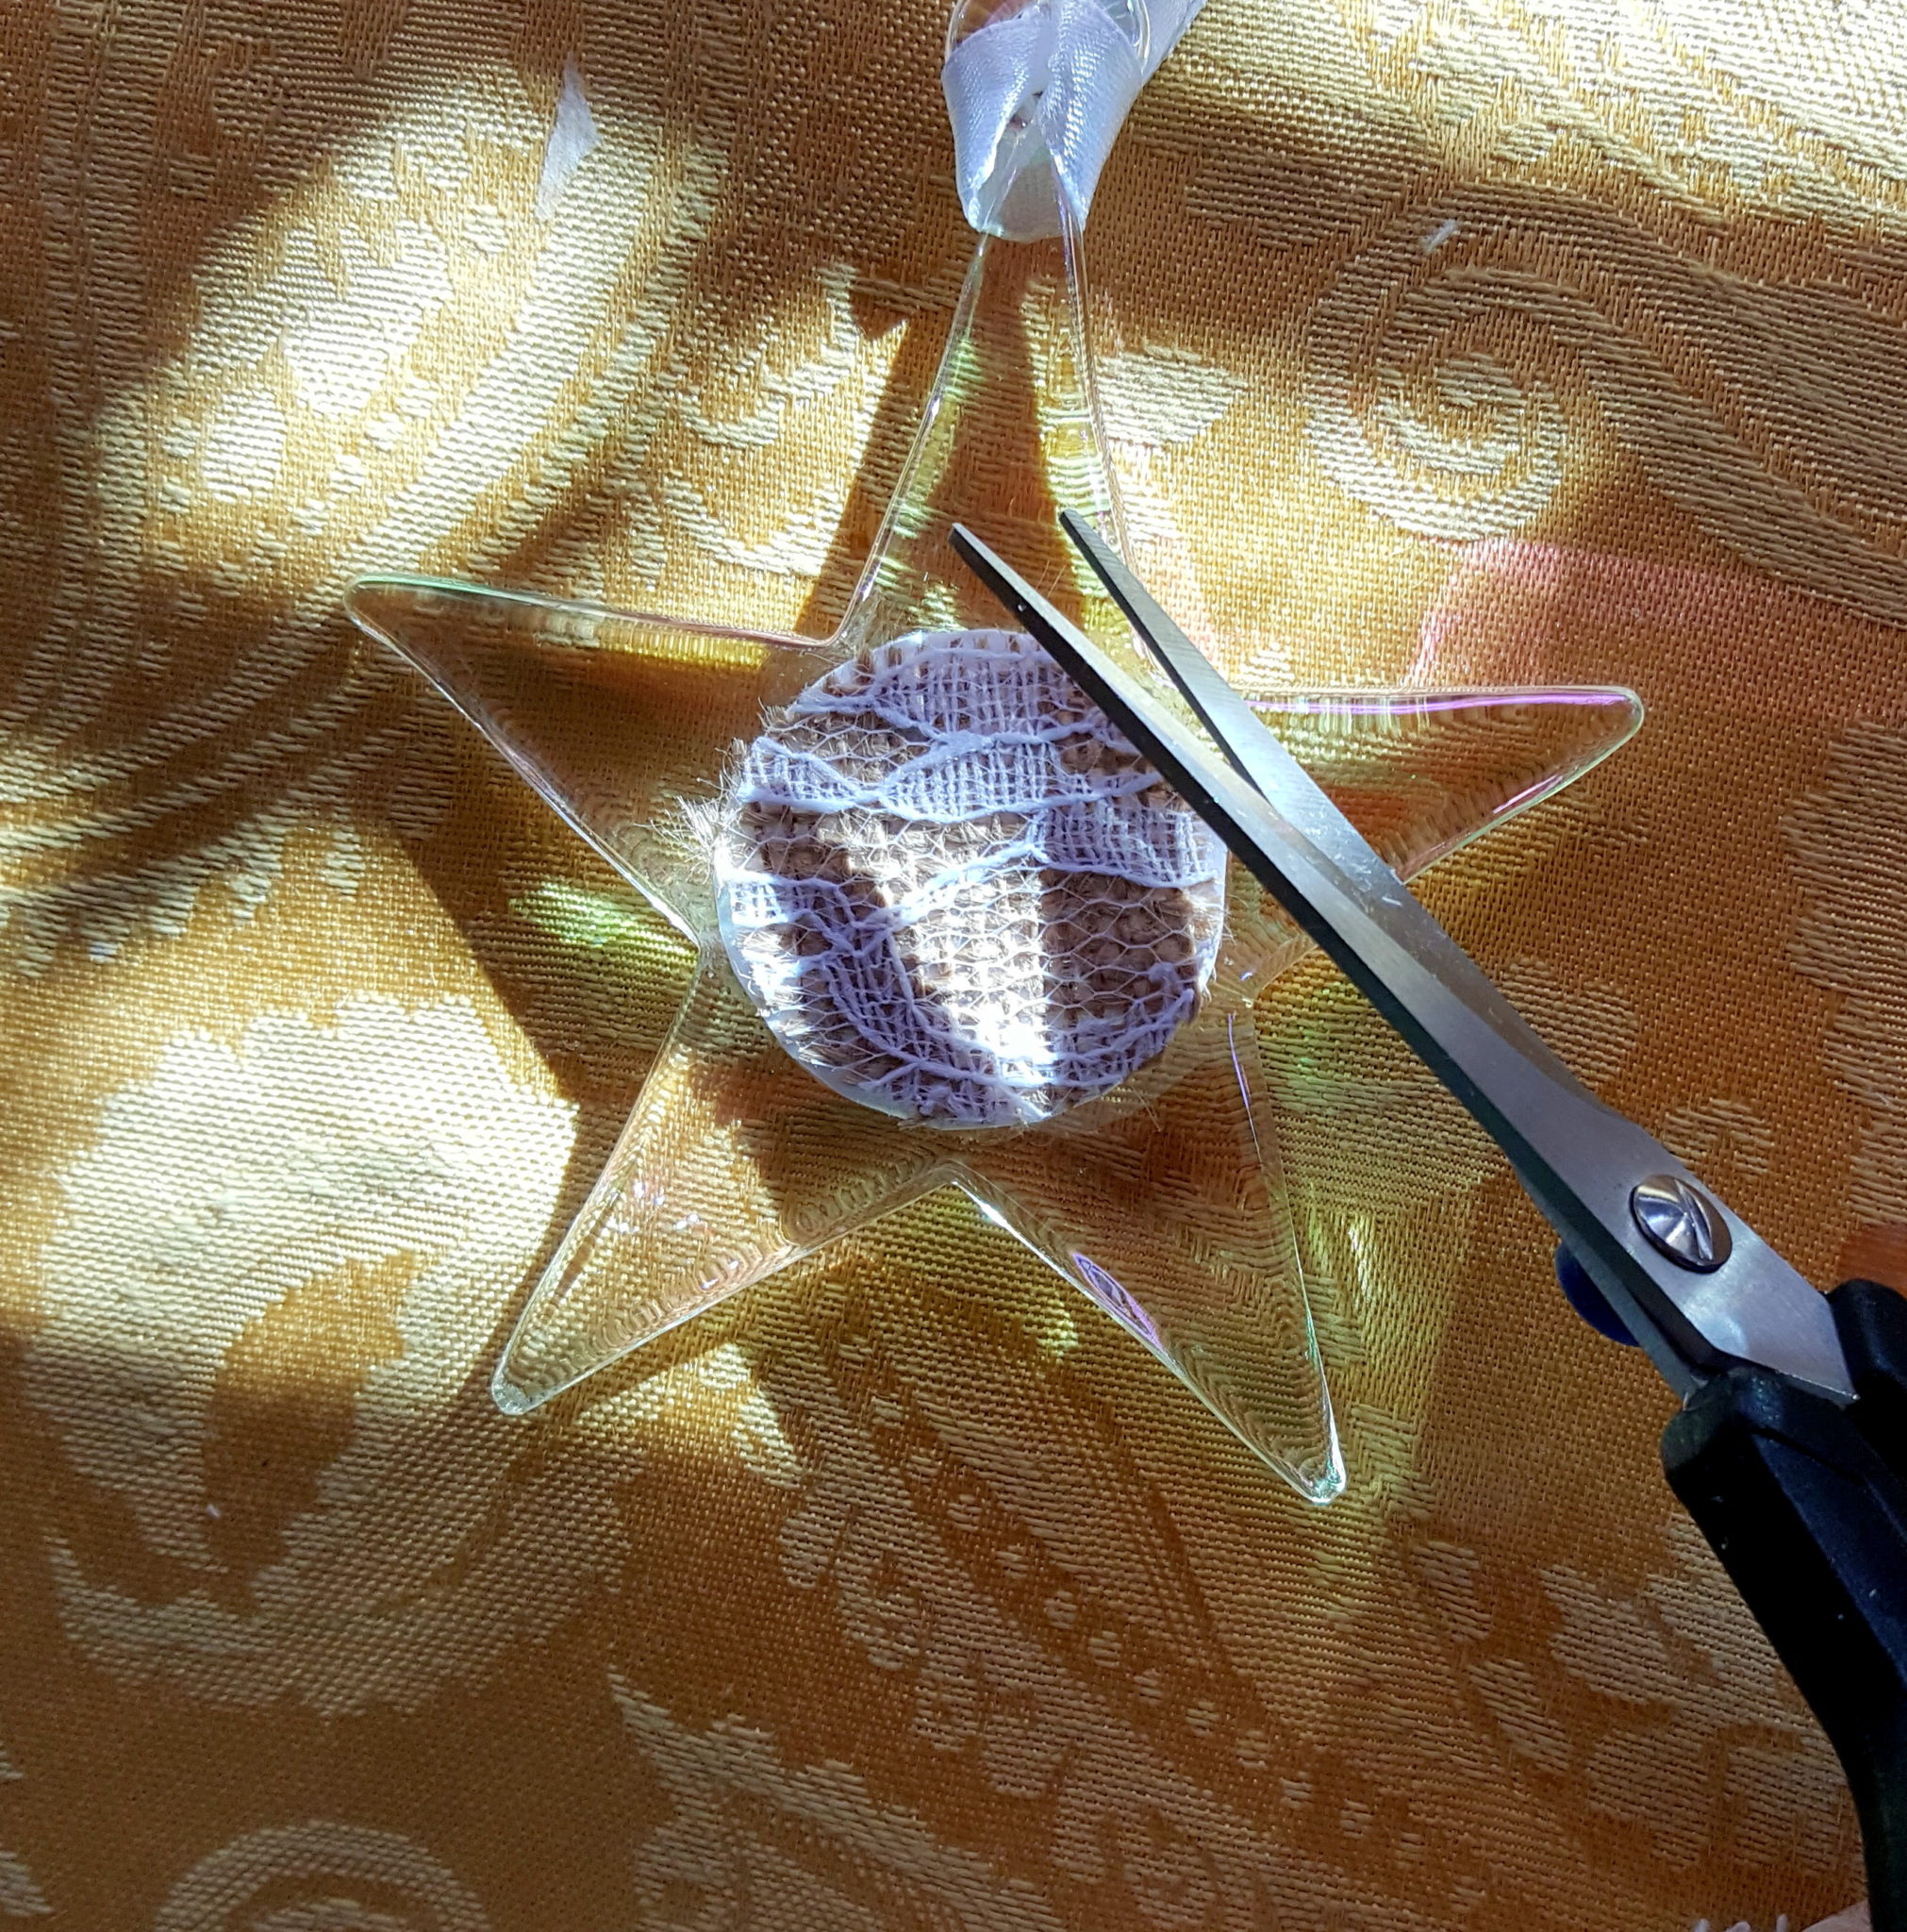
After you have wiped the ornament down be sure to trim any loose strings on the edge of the photo/ribbon
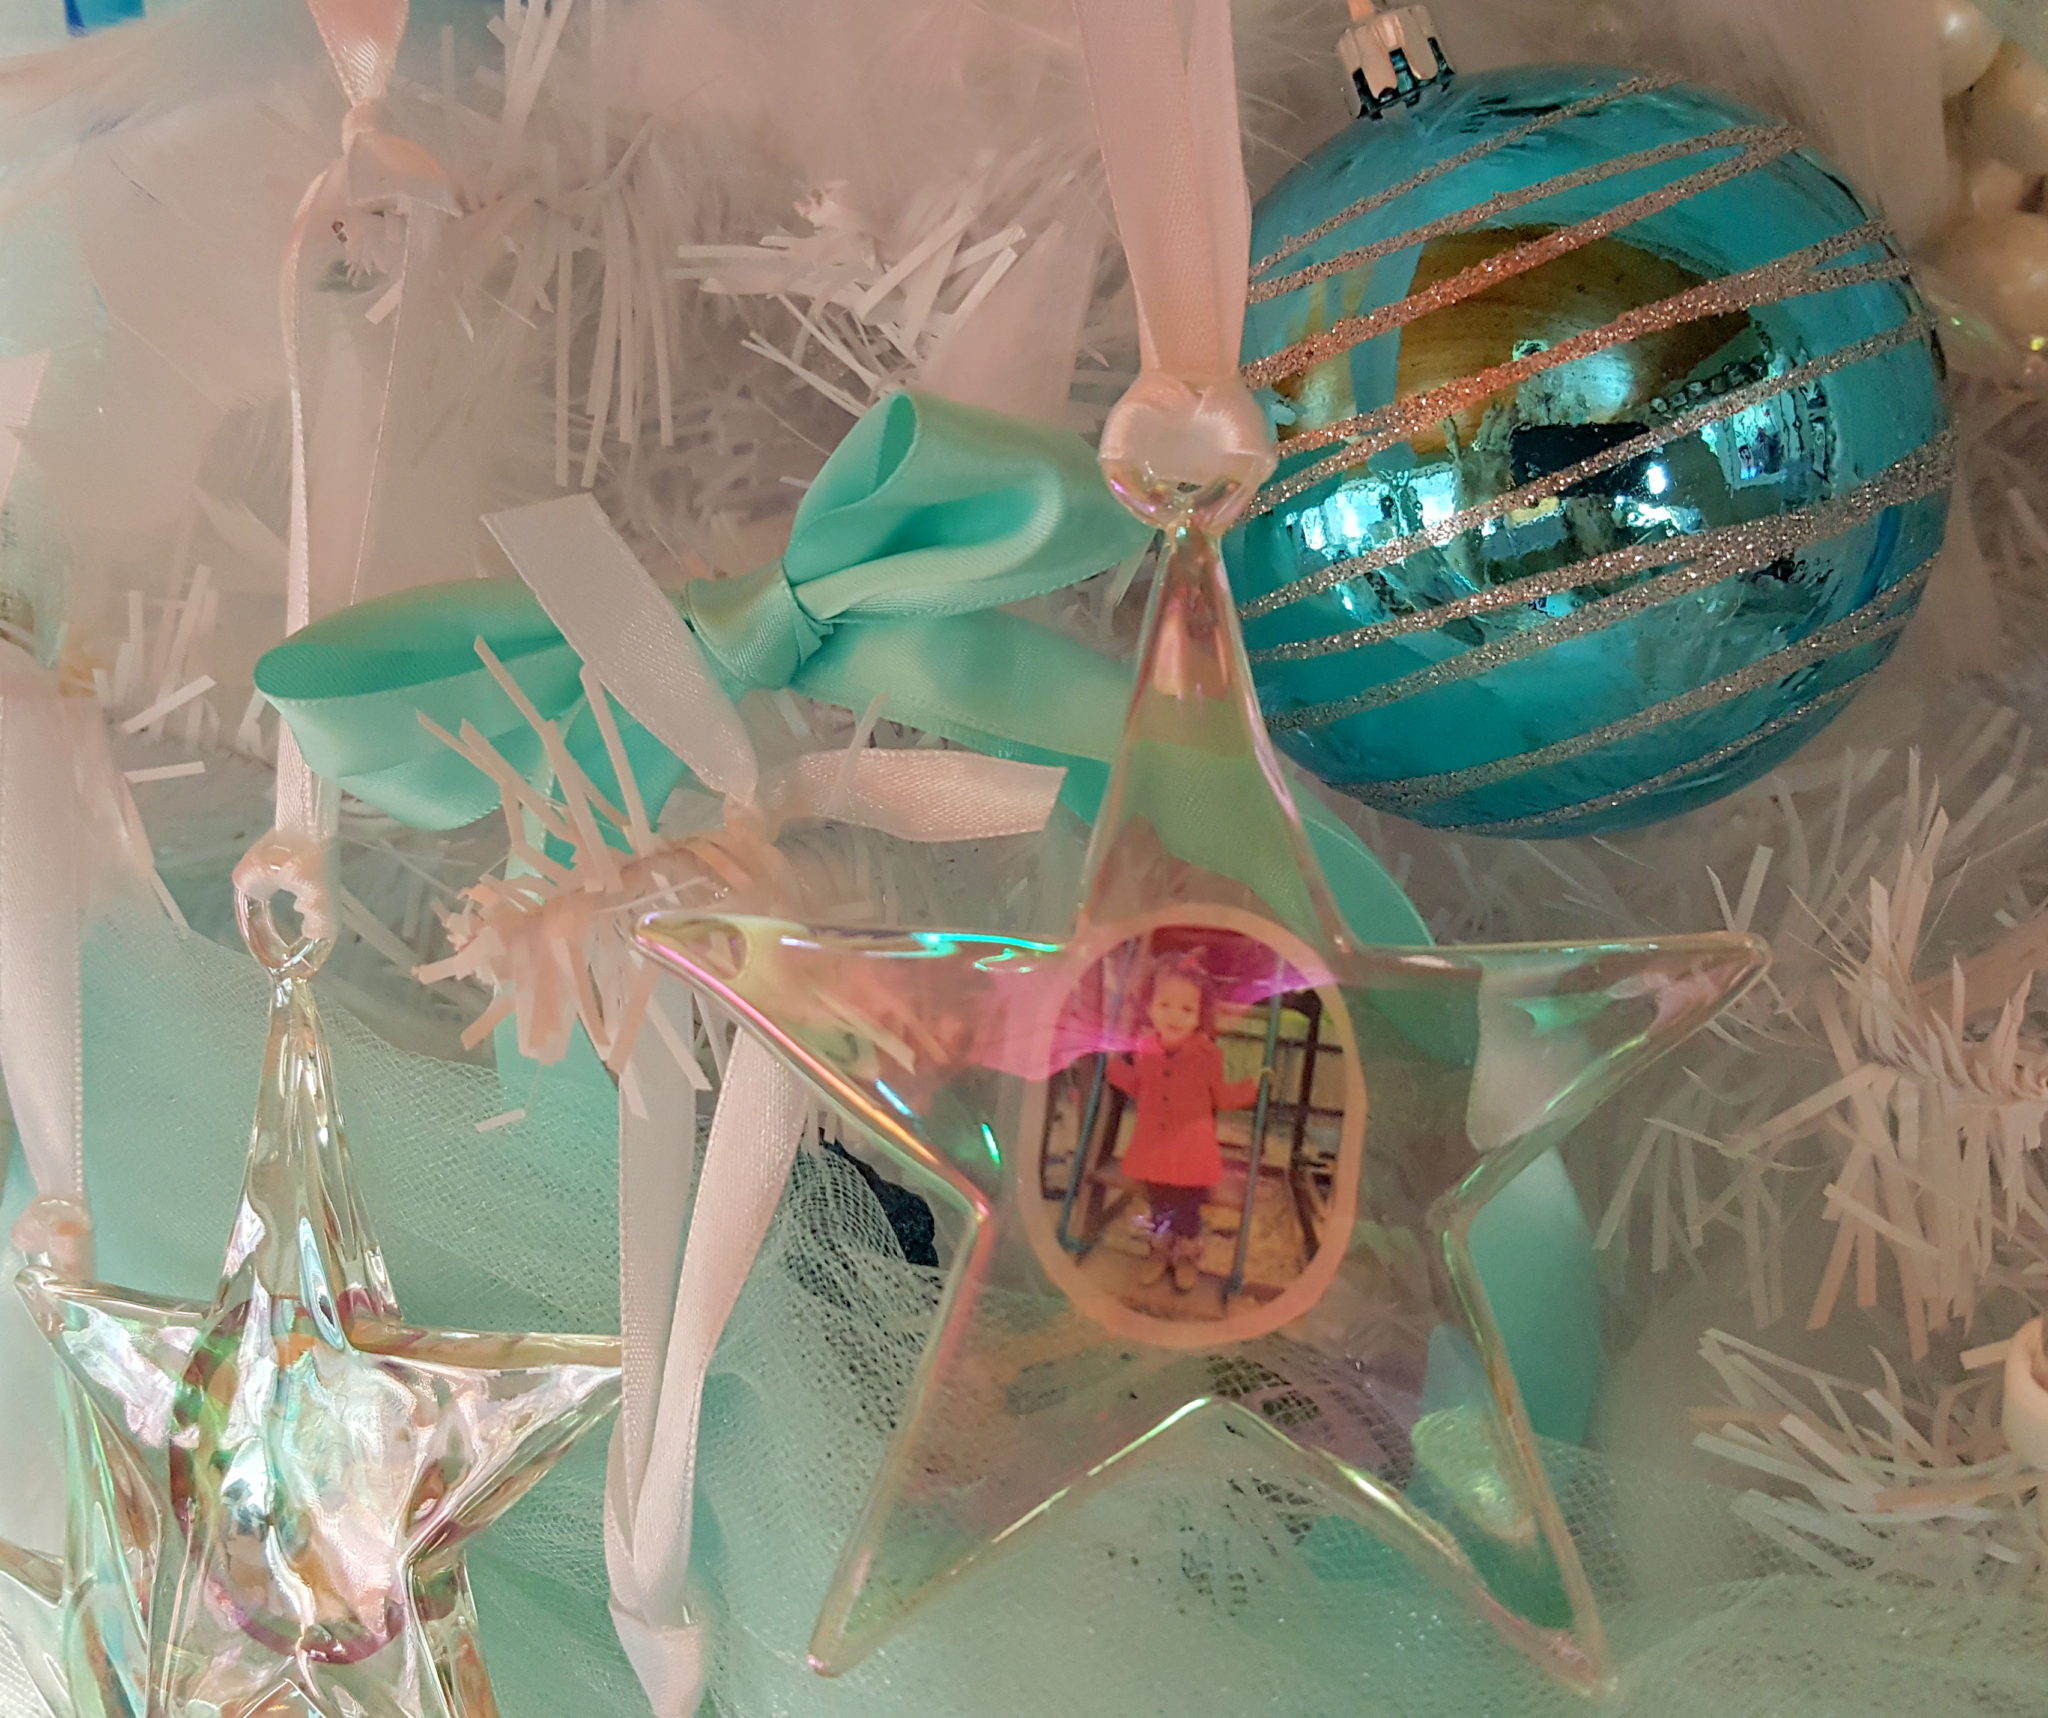
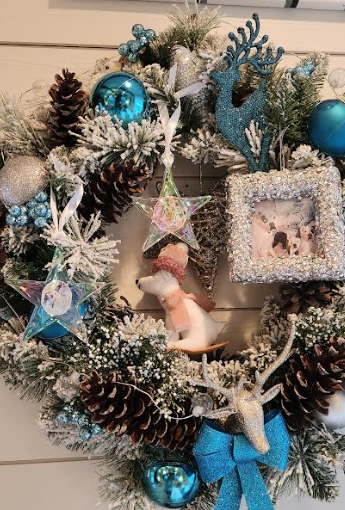
You can also make beautiful ornaments with cute children’s photos like the one above I made for my sister.

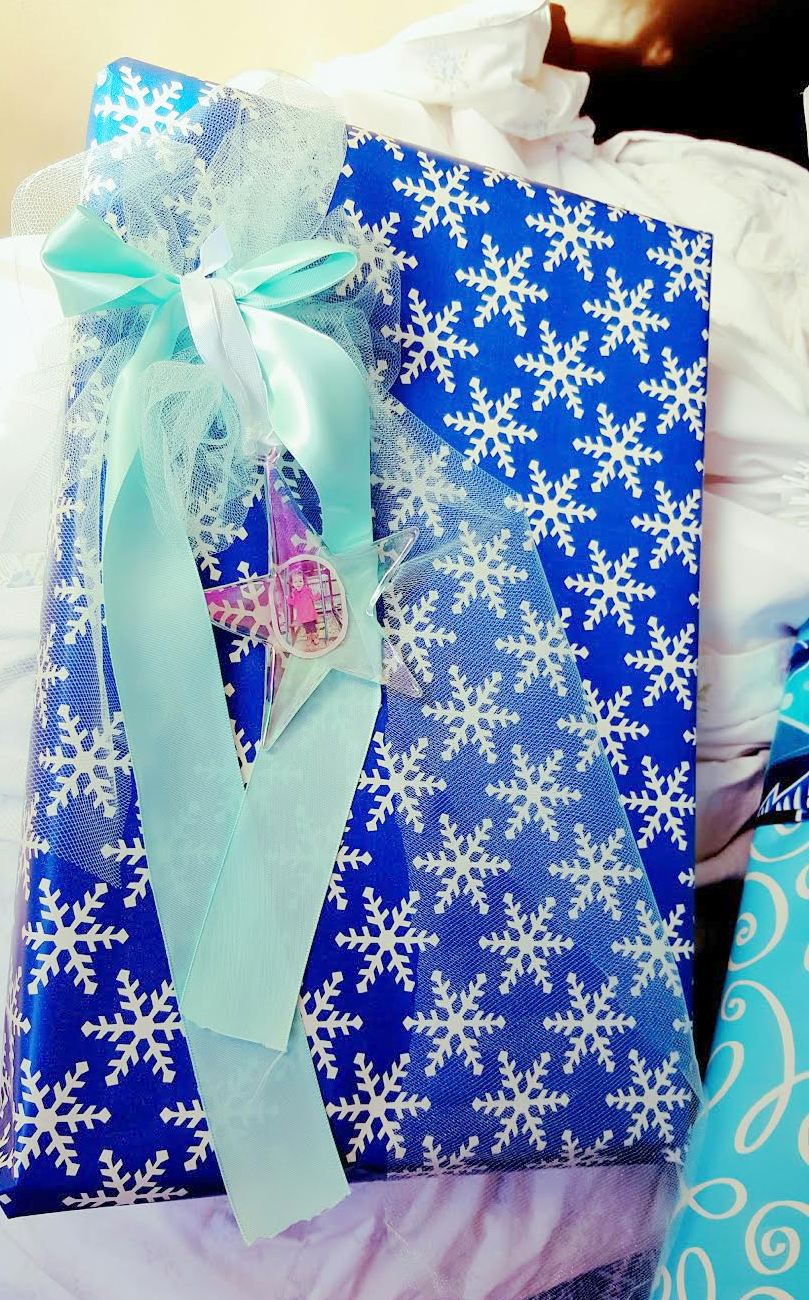
These ornaments are sentimental and make wonderful personalized Holiday gifts! You can easily mail them (because they look like glass but are plastic). A great way to put an extra bit of love into your gift wrapping is to incorporate one of these beautiful ornaments on the outside of your wrapped package.
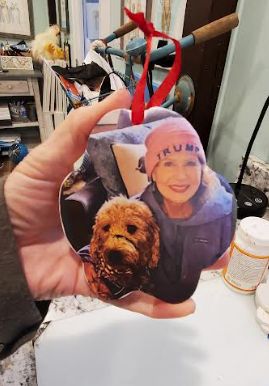
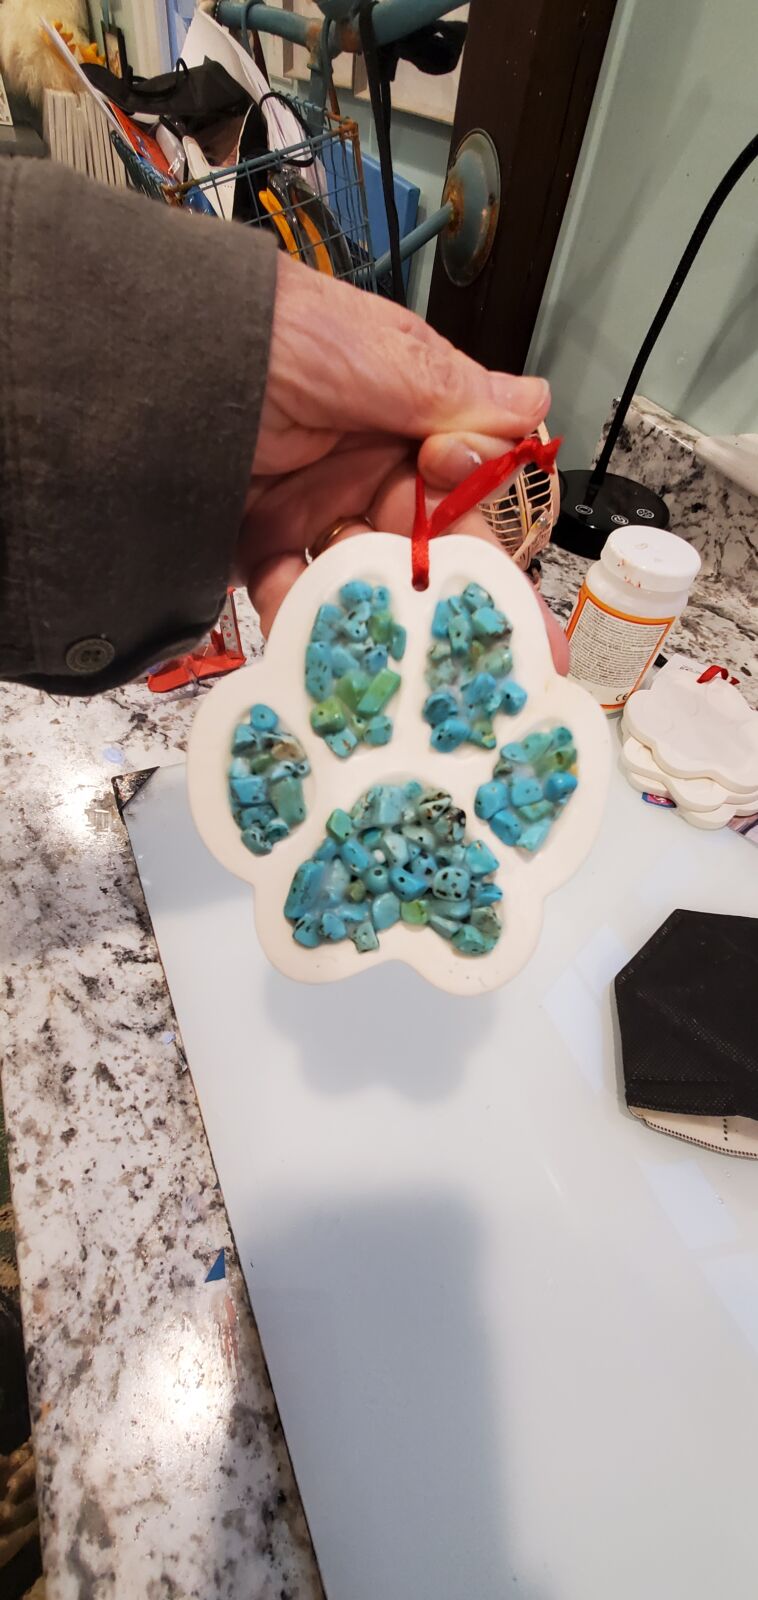
This year (2024) Michaels hat the plaster dog paw ornaments on sale for. 99 cents each so I had fun using the Mod Podge to make one for my sister. I did a collage of her photo with her dog JJ on one side, poured Mod Podge in the paw print indentations and filled them with little turquoise beads and let them dry. Once the beads had dried in place, I brushed a layer of Mod Podge on top of each mound of beads and let that dry so that it would keep the beads in place. Here are the results (below):
How much fun would it be to make beautiful dog ornaments for your local shelter dogs to put on the outside of their kennels to help get the shelter dogs adopted?
I hope you have time to make these fun ornaments and feel the joy in giving them to friends and loved ones.
Merry Christmas! Love you all …mean it!
~ Christina Lee – Deaf Dogs Rock
[/fusion_text][/fusion_builder_column][/fusion_builder_row][/fusion_builder_container]